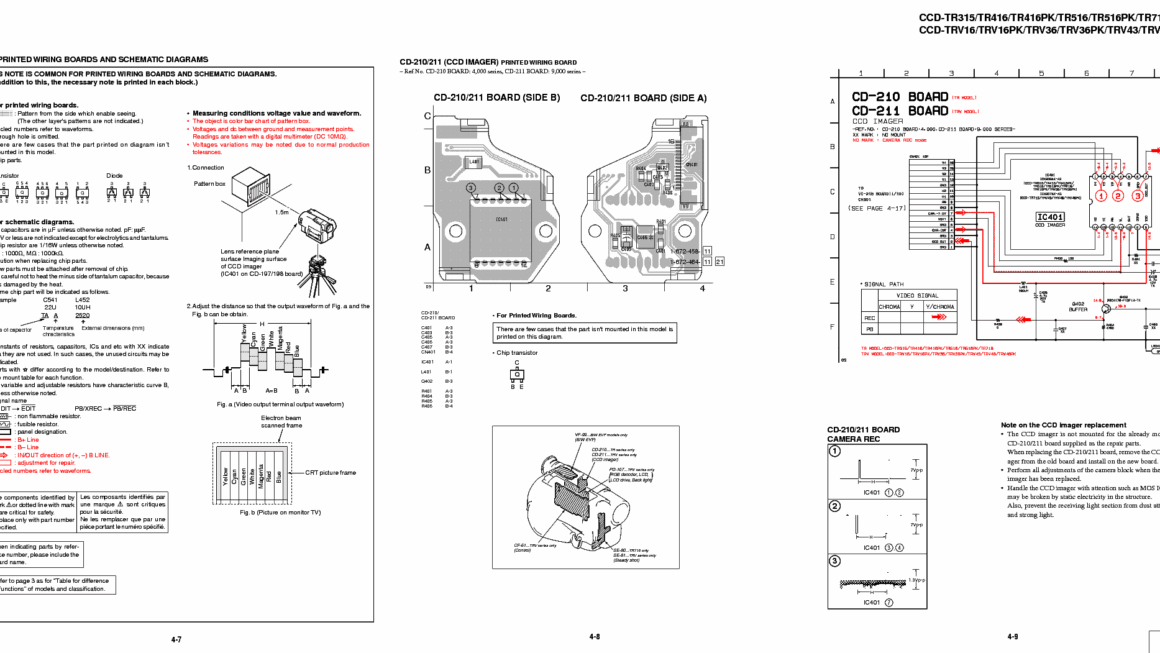
If you’re into electronics or DIY projects, you might have come across the term “Sony CCD board wiring diagram.” This diagram is essential for connecting the various components of a Sony CCD board correctly.
Whether you’re repairing a faulty Sony CCD board or building a new project from scratch, having a wiring diagram is crucial. It helps you understand how the various components of the board are connected and ensures everything works smoothly.

Related Post Ford F150 Stereo Wiring Diagram
When following a Sony CCD board wiring diagram, make sure to double-check all connections and polarities. A single mistake in wiring can lead to malfunctions or even permanent damage to the board. Take your time and follow the instructions carefully.
If you’re unsure about any part of the wiring diagram, don’t hesitate to consult online resources or forums for assistance. It’s better to seek help and ensure everything is connected correctly than risk damaging your Sony CCD board.
Once you’ve successfully wired your Sony CCD board following the diagram, it’s time to test it out. Connect the board to a compatible device or power source and check if everything is working as expected. Troubleshoot any issues that arise before finalizing the setup.
In conclusion, a Sony CCD board wiring diagram is a valuable tool for anyone working with Sony CCD boards. By following the instructions carefully and double-checking all connections, you can ensure a smooth and successful setup. Remember to seek help if needed and test the board thoroughly before use.
Download and Print Sony Ccd Board Wiring Diagram Listed below