Are you looking to learn how to wire a three-prong plug? Look no further! In this article, we will guide you through the process step by step, making it easy for even beginners to understand.
Whether you’re replacing a damaged plug or installing a new one, knowing how to wire a three-prong plug is a valuable skill to have. With the right tools and a little know-how, you can do it yourself in no time!

Related Post 24V Hvac Relay Wiring Diagram
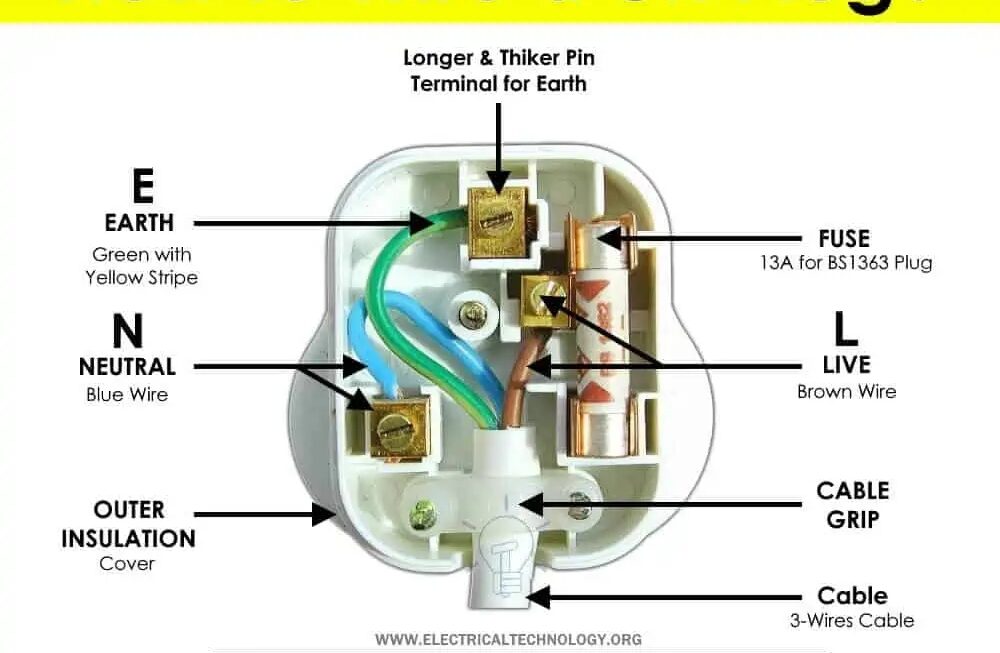
Start by cutting the cord to the desired length, leaving enough room to work with. Use the wire stripper to remove the insulation from the end of the cord, exposing the wires inside. Next, twist the bare wires to prevent fraying.
Now, it’s time to connect the wires to the plug. The three-prong plug will have three screws – one for the hot wire (usually black), one for the neutral wire (usually white), and one for the ground wire (usually green or bare). Follow the wiring diagram provided with the plug to ensure the correct connections.
Once you have securely fastened the wires to the plug, carefully tuck them inside and tighten the screws. Double-check your connections to make sure everything is secure. Finally, replace the plug cover and test the appliance to ensure it is working properly.
With these simple steps, you can successfully wire a three-prong plug and avoid the need for costly professional help. Remember to always prioritize safety and consult a professional if you are unsure about any part of the process.
Now that you have mastered the art of wiring a three-prong plug, you can confidently tackle future projects with ease. By following this guide and practicing safe electrical work, you can save time and money while learning a valuable skill. Happy wiring!
Download and Print Three Prong Plug Wiring Diagram Listed below