If you’re looking to install trailer lights on your vehicle, understanding how to wire the junction box is crucial. Trailer junction box wiring diagrams can help you navigate the process with ease.
By following a wiring diagram, you can ensure that your trailer lights function properly and adhere to safety standards. Let’s explore the ins and outs of trailer junction box wiring diagrams.

Related Post Sony Ccd Icx226Ak Wiring Diagram
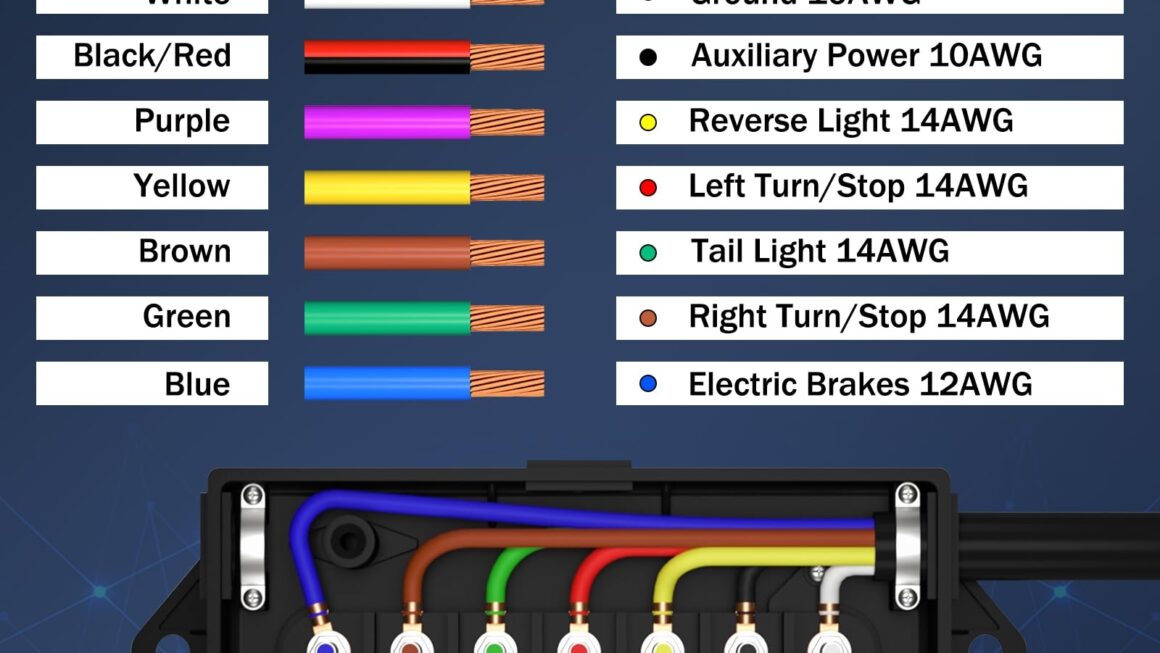
When referencing a wiring diagram, you’ll typically come across symbols representing different elements such as wires, connectors, and lights. Understanding these symbols is key to successfully wiring your trailer junction box.
Additionally, it’s crucial to follow the color-coding indicated in the wiring diagram. This helps you match the right wires and connectors, preventing any confusion and ensuring a smooth installation process.
Before embarking on the wiring process, make sure to gather all the necessary tools and materials. This includes wire cutters, crimping tools, electrical tape, and of course, the trailer junction box wiring diagram.
Once you’ve completed the wiring process according to the diagram, be sure to test your trailer lights to ensure they are functioning correctly. This step is essential for guaranteeing the safety of yourself and others on the road.
In conclusion, understanding how to read and implement a trailer junction box wiring diagram is essential for anyone looking to install trailer lights. By following the guidelines provided in the diagram and paying attention to detail, you can ensure a successful and safe wiring process.
Download and Print Trailer Junction Box Wiring Diagram Listed below

Related Post Ice Cube Relay Wiring Diagram