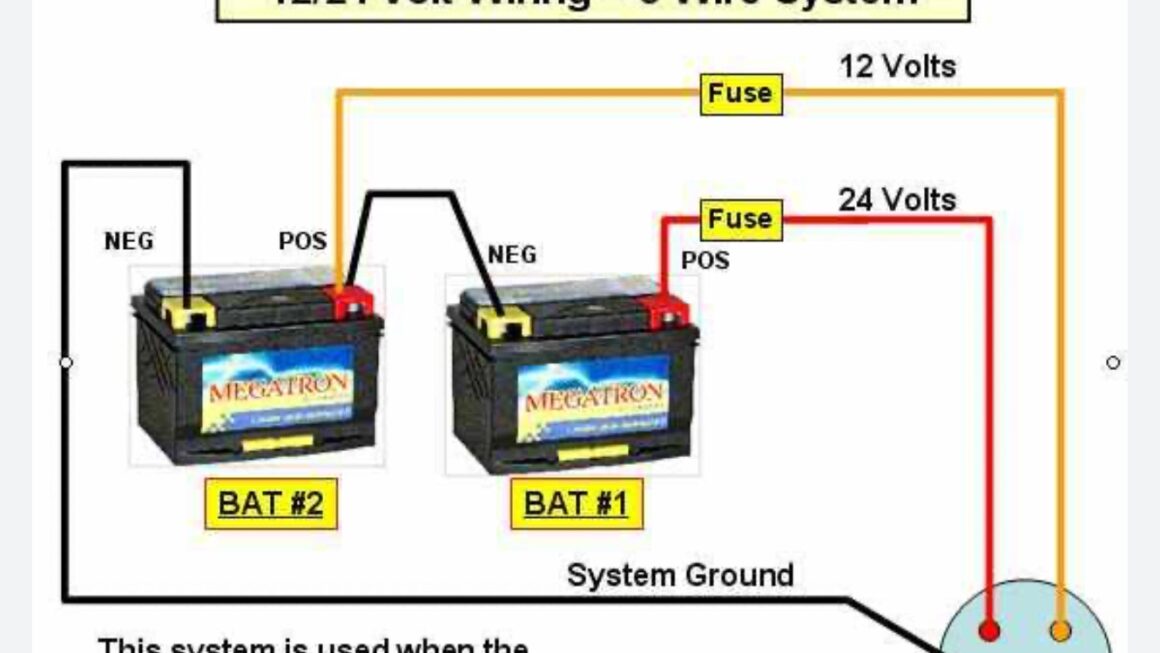
Are you looking to set up a trolling motor on your boat but feeling overwhelmed by all the wiring? No need to worry, as we have got you covered with a simple and easy-to-follow guide on Trolling Motor 24 Volt Wiring Diagram.
Setting up a trolling motor may seem like a daunting task, but with the right information and guidance, you can easily get it done. By following a wiring diagram specifically designed for a 24-volt trolling motor, you can ensure a smooth and hassle-free installation process.

Related Post 6 Prong Trailer Wiring Diagram
Next, you will need to connect the positive and negative terminals of your trolling motor to the corresponding terminals on the battery. It is essential to follow the diagram precisely to avoid any potential issues or malfunctions. Additionally, make sure to secure all connections properly to prevent any loose wiring.
After connecting the trolling motor to the battery, it is recommended to test the system to ensure everything is working correctly. You can do this by turning on the motor and checking for any unusual sounds or vibrations. If everything seems to be in order, you can proceed with securing the wiring in place and tidying up any loose ends.
In conclusion, setting up a 24-volt trolling motor may seem like a complex task, but with the right guidance and a clear wiring diagram, you can easily accomplish the task. By following the steps outlined in this article, you can ensure a successful installation and enjoy a smooth sailing experience with your newly installed trolling motor.
Download and Print Trolling Motor 24 Volt Wiring Diagram Listed below