Are you looking for a reliable trolling motor wiring diagram for your 24-volt system? Look no further! Having the right wiring setup is crucial for the efficient operation of your trolling motor, so let’s dive into the details.
Whether you’re a seasoned angler or just starting out, understanding how to properly wire your trolling motor can make a big difference in your fishing experience. With the right diagram and a little know-how, you can ensure that your motor runs smoothly and efficiently every time you hit the water.

Related Post Wiring Electric Brakes On Trailer Diagram
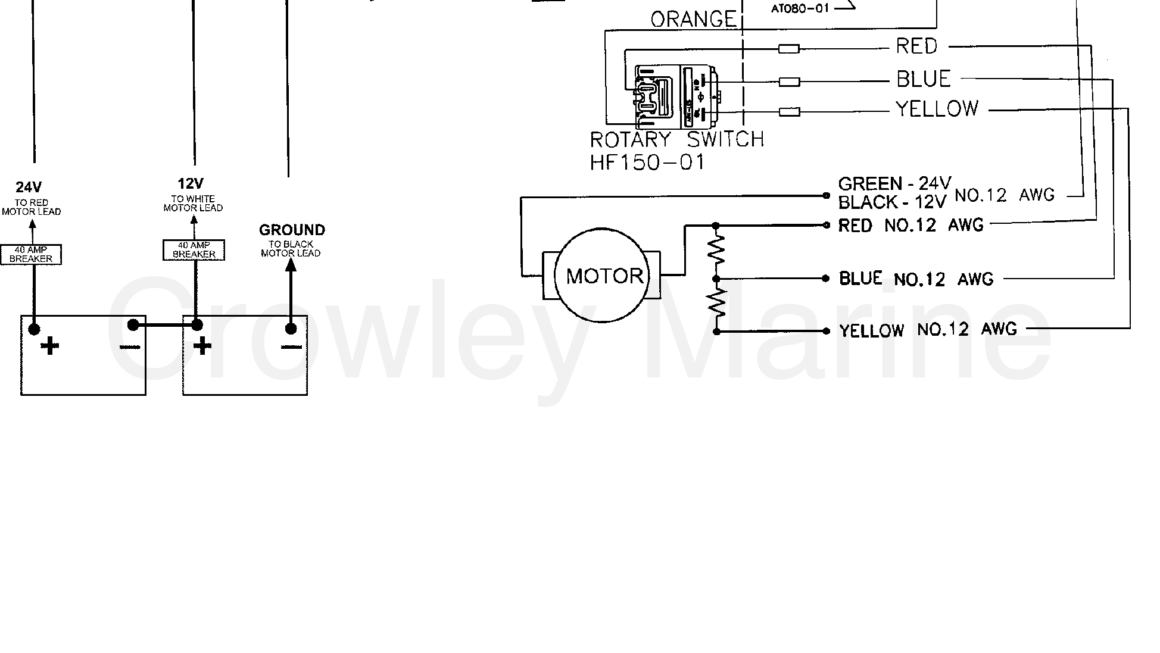
When wiring a 24-volt trolling motor, it’s crucial to connect the batteries correctly. Make sure to connect the positive terminal of one battery to the negative terminal of the other battery. This series connection will create a 24-volt system that is ideal for powering your trolling motor efficiently.
Next, you’ll need to connect the trolling motor to the batteries using the appropriate gauge of wire. It’s important to use the correct wire size to ensure that your motor receives the proper amount of power without overheating or short-circuiting. Follow the wiring diagram carefully to make the connections correctly.
Once you have completed the wiring process, be sure to test the system before hitting the water. Turn on the trolling motor and ensure that it runs smoothly and quietly. If you encounter any issues, double-check your connections and make any necessary adjustments before heading out for a day of fishing.
In conclusion, having the right trolling motor wiring diagram for your 24-volt system is essential for the proper functioning of your motor. By following the correct wiring setup and using the appropriate materials, you can ensure that your trolling motor operates efficiently every time you head out on the water.
Download and Print Trolling Motor Wiring Diagram 24 Volt Listed below