If you’re looking for a reliable and efficient way to wire your Troy Bilt solenoid, you’ve come to the right place. Understanding the wiring diagram is crucial to ensure proper functioning of your equipment.
With the right knowledge and guidance, you can easily tackle this task without any hassle. In this article, we’ll walk you through the Troy Bilt solenoid wiring diagram step by step, so you can get your equipment up and running in no time.

Related Post Squier Jazzmaster Hh Active Pickups Wiring Diagram
Start by locating the solenoid on your Troy Bilt equipment. It’s usually located near the battery and is responsible for engaging the starter motor. Refer to your wiring diagram to identify the correct terminals for the positive and negative wires.
Next, carefully disconnect the battery to avoid any accidents. Use your wire cutters to trim the wires to the appropriate length and strip the insulation off the ends. Connect the wires to the corresponding terminals on the solenoid, ensuring a secure and snug fit.
Once you’ve double-checked all your connections, reattach the battery and test the solenoid. If everything is wired correctly, your equipment should start up without any issues. Remember to follow all safety precautions and guidelines throughout the process.
In conclusion, wiring your Troy Bilt solenoid doesn’t have to be a daunting task. With the right information and a little bit of patience, you can successfully complete this job and keep your equipment running smoothly. If you’re ever unsure or need additional assistance, don’t hesitate to consult a professional for help.
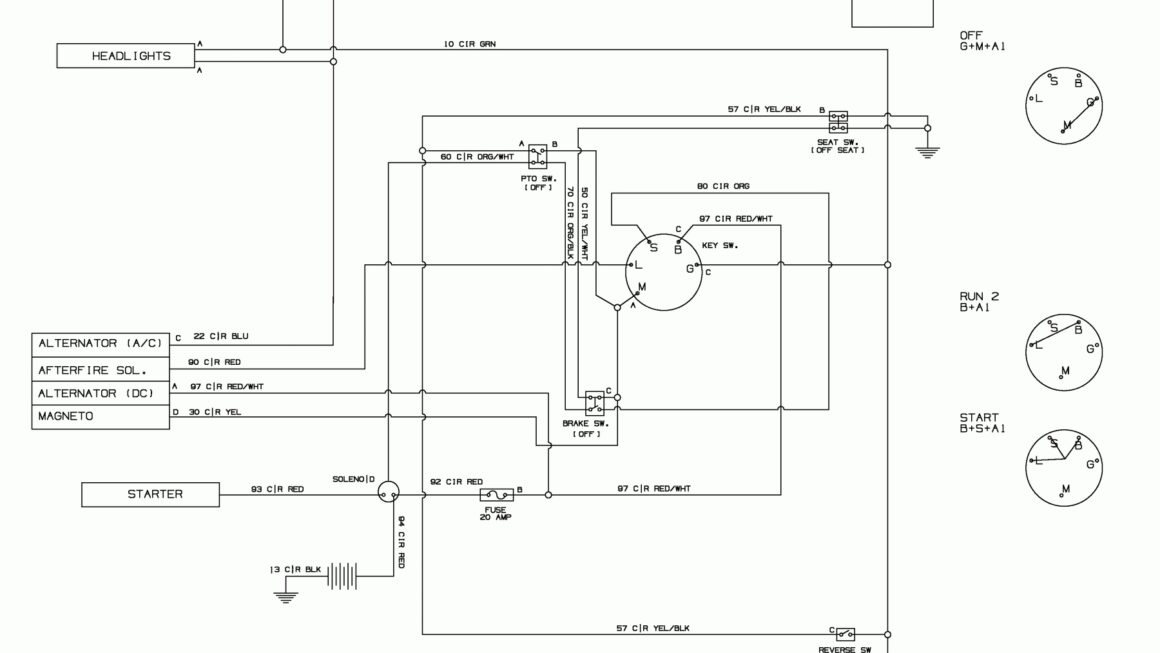
Download and Print Troy Bilt Solenoid Wiring Diagram Listed below

Related Post Wiring Diagram 30 Amp Rv Plug