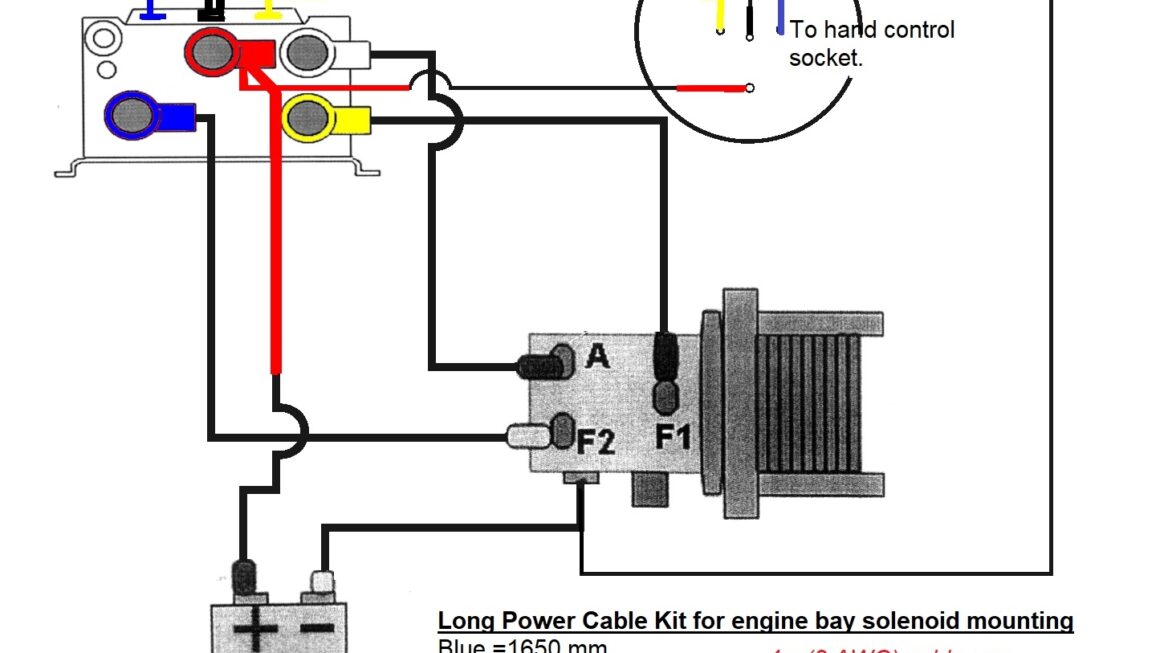
When it comes to off-roading adventures, having a reliable winch on your vehicle can be a game-changer. Warn winches are known for their quality and durability, but understanding the wiring diagram for the solenoid is essential for proper installation and operation.
Whether you are a seasoned off-roader or new to the world of winching, knowing how to wire your Warn winch solenoid correctly is crucial. By following a wiring diagram specific to your model, you can ensure that your winch functions safely and effectively when you need it most.

Related Post Wiring Diagram For Ezgo Txt
Refer to the wiring diagram provided by Warn for your specific winch model. This diagram will outline the color-coding of the wires and where each wire should be connected on the solenoid. Take your time to study the diagram and make sure you have a clear understanding before proceeding with the installation.
When wiring the solenoid, it is important to use the correct gauge of wire and ensure that all connections are secure. Loose connections can lead to malfunctioning of the winch or even pose a safety hazard. Double-check your wiring against the diagram to confirm that everything is in the right place.
Once you have completed the wiring process, test the winch to ensure that it operates smoothly in both directions. Pay attention to any unusual sounds or movements that could indicate a wiring issue. If everything checks out, you are ready to hit the trails with confidence in your properly installed Warn winch.
In conclusion, understanding the wiring diagram for your Warn winch solenoid is essential for safe and effective operation. By following the guidelines provided by Warn and taking the time to wire your winch correctly, you can enjoy peace of mind knowing that your winch will perform when you need it most. Happy off-roading!
Download and Print Warn Winch Solenoid Wiring Diagram Listed below