Are you looking to install a well water pump at home but feeling overwhelmed by the wiring process? Well, you’ve come to the right place! Understanding the well water pump wiring diagram is crucial to ensure your pump functions correctly and efficiently.
Proper wiring is essential to prevent any electrical hazards and ensure your pump operates smoothly. By following a well water pump wiring diagram, you can easily connect the necessary components and troubleshoot any issues that may arise.

Related Post 3 Way Switch Wiring Diagram Power To Switch
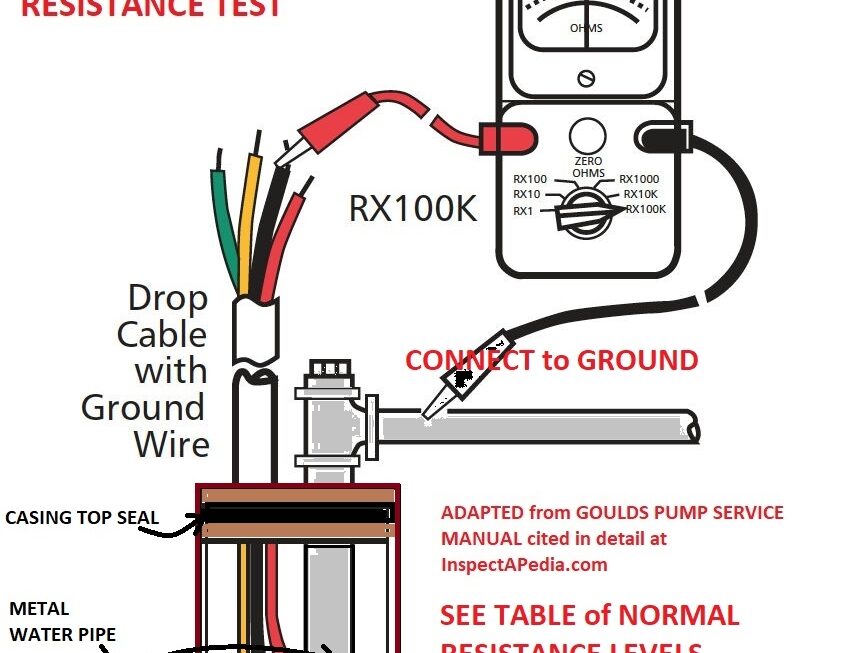
Well Water Pump Wiring Diagram
Before you begin the wiring process, it’s important to gather all the necessary tools and materials. This includes wire strippers, electrical tape, wire connectors, and of course, the well water pump wiring diagram provided by the manufacturer.
Start by carefully studying the diagram to understand how each component is connected. Identify the power source, pump motor, pressure switch, and any other components that may be included in the wiring system.
Next, follow the color-coded instructions on the diagram to connect the wires accordingly. Remember to double-check each connection to ensure they are secure and properly insulated to prevent any short circuits.
Once you have completed the wiring process, test the pump to ensure it is functioning correctly. Monitor the pressure levels and listen for any unusual noises that may indicate a wiring issue. If everything looks good, congratulations! You have successfully wired your well water pump.
In conclusion, understanding and following a well water pump wiring diagram is essential for a successful installation. By taking the time to study the diagram, gather the necessary tools, and follow the instructions carefully, you can ensure your pump operates efficiently and safely for years to come.
Download and Print Well Water Pump Wiring Diagram Listed below