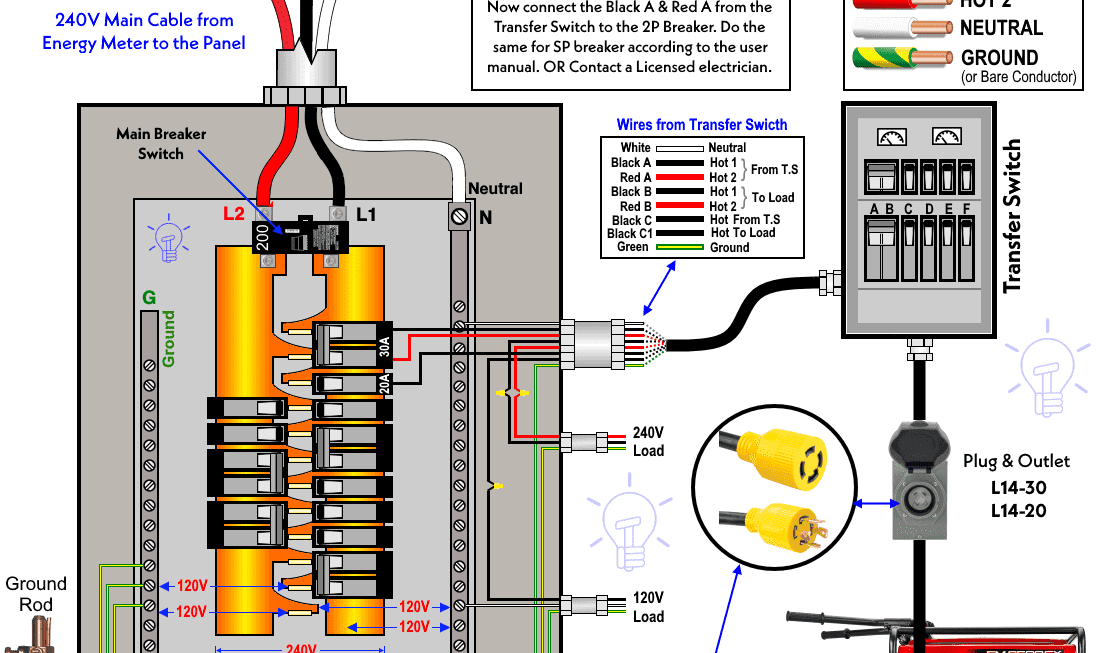
Are you looking to set up a transfer switch for your home generator? Understanding how to wire a transfer switch diagram is essential for a safe and efficient installation process. With the right guidance, you can easily tackle this DIY project and ensure your home is prepared for any power outages.
Before diving into the wiring process, it’s important to familiarize yourself with the components involved in a transfer switch setup. From the main electrical panel to the generator inlet box, each part plays a crucial role in ensuring seamless power transfer during emergencies.

Related Post Wiring Diagram For A White-Rodgers Thermostat
One of the key steps in wiring a transfer switch is connecting the transfer switch to the main electrical panel. This involves identifying the appropriate breaker to connect the transfer switch to and ensuring a secure and stable connection. It’s crucial to follow the manufacturer’s instructions to avoid any errors.
Once the transfer switch is connected to the main electrical panel, you can proceed with wiring the generator inlet box. This box serves as the connection point between the generator and the transfer switch, allowing for power to be transferred seamlessly. Make sure to double-check all connections to ensure they are secure.
After completing the wiring process, it’s essential to test the transfer switch to ensure it is functioning correctly. Perform a test run by simulating a power outage and switching the power source from the utility grid to the generator. If everything is working as expected, you can rest assured knowing your home is equipped to handle any power disruptions.
By following the wiring a transfer switch diagram and taking the necessary precautions, you can successfully install a transfer switch for your home generator. With proper installation and maintenance, you can have peace of mind knowing your home is prepared for unexpected power outages.
Download and Print Wiring A Transfer Switch Diagram Listed below