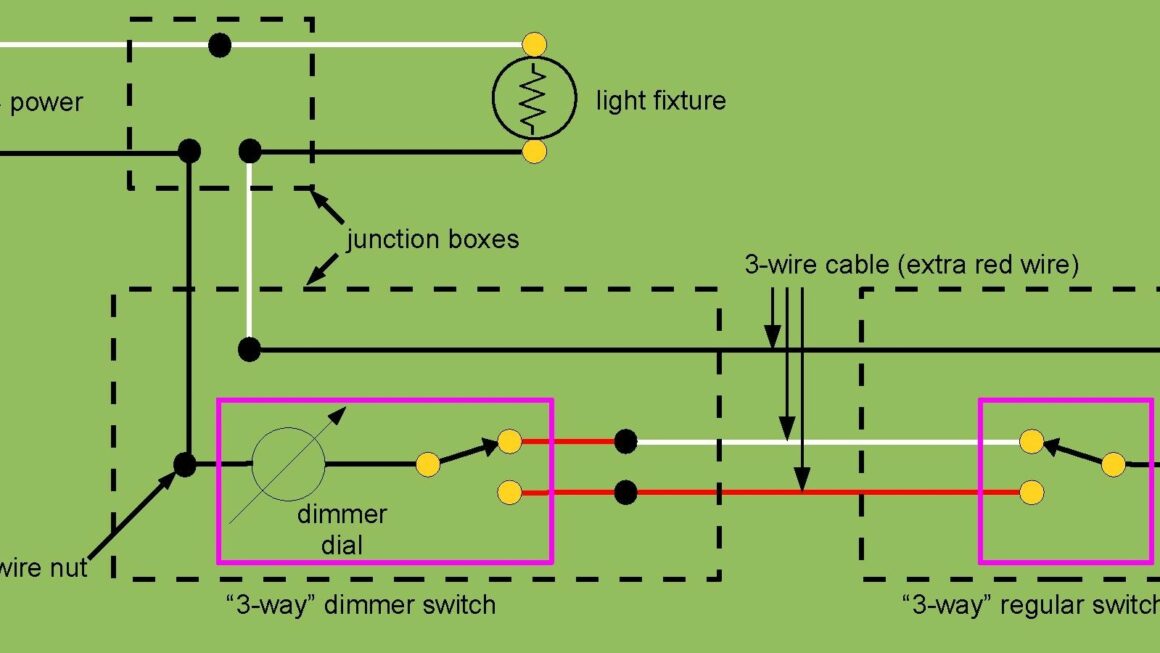
Are you looking to install a 3-way dimmer switch in your home but feeling a bit overwhelmed by the wiring diagram? Don’t worry, we’ve got you covered! Understanding how to wire a 3-way dimmer switch can seem like a daunting task, but with a little guidance, you’ll have it done in no time.
Before we dive into the wiring diagram for a 3-way dimmer switch, let’s first understand what a 3-way switch is. A 3-way switch allows you to control a single light fixture from two different locations. This is perfect for areas such as staircases or hallways where you want to be able to turn the lights on or off from multiple spots.

Related Post Pdf C3 1982 Corvette Wiring Diagram
After all the wires are securely connected, carefully tuck everything back into the switch box and secure the dimmer switch in place. Turn the power back on, and test out your new 3-way dimmer switch. If everything is working correctly, pat yourself on the back for a job well done!
Wiring a 3-way dimmer switch may seem intimidating at first, but with a little patience and know-how, you’ll be able to tackle this project with confidence. Remember, if you ever feel unsure about any step in the process, don’t hesitate to consult a professional electrician for assistance.
In conclusion, installing a 3-way dimmer switch is a great way to add convenience and ambiance to your home lighting. By following the proper wiring diagram and taking the necessary precautions, you’ll be able to enjoy the benefits of dimmable lighting in no time. Happy DIY-ing!
Download and Print Wiring Diagram 3 Way Dimmer Switch Listed below