Have you ever been confused about how to wire a 4 way switch in your home? Don’t worry, you’re not alone! Understanding wiring diagrams can be tricky, but with a little guidance, you’ll be able to tackle this project with confidence.
Knowing how to wire a 4 way switch is essential for controlling lights from multiple locations. Whether you’re installing new switches or troubleshooting existing ones, having a clear wiring diagram is key to getting the job done right.

Related Post Ford 850 Tractor Wiring Diagram
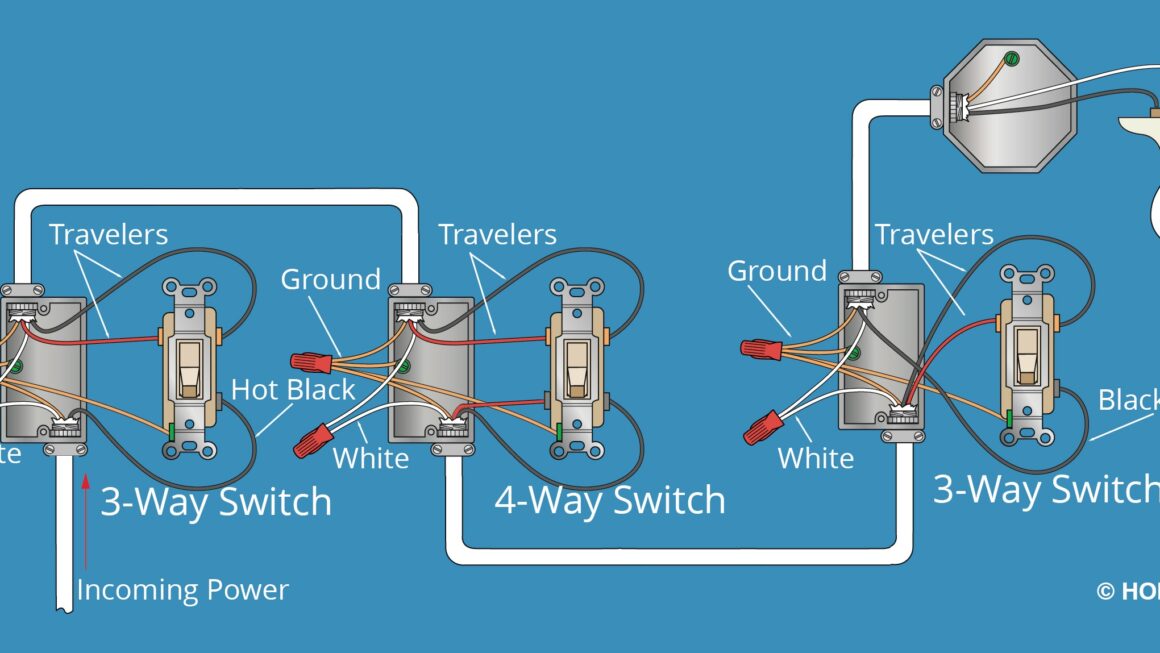
When looking at a wiring diagram for a 4 way switch, you’ll see four terminals and two 3-way switches. The terminals are labeled as traveler wires, which are used to connect the switches together and control the flow of electricity to the light fixture.
To wire a 4 way switch correctly, you’ll need to connect the traveler wires from one switch to the corresponding terminals on the other switch. It’s important to follow the diagram carefully and double-check your connections to ensure everything is wired correctly.
Once you’ve successfully wired your 4 way switch, you’ll have the convenience of controlling your lights from multiple locations without any hassle. With the right tools and a bit of know-how, you can tackle this project like a pro.
Now that you have a better understanding of how to wire a 4 way switch, you can confidently take on this project in your own home. Remember to follow the wiring diagram carefully and seek help if needed. With a little patience and determination, you’ll have your lights shining bright in no time!
Download and Print Wiring Diagram For 4 Way Switch Listed below