Looking to install a 5 pin rocker switch but not sure how to wire it up? You’ve come to the right place! In this article, we’ll provide you with a step-by-step wiring diagram to help you get your rocker switch up and running in no time.
Whether you’re a beginner or a seasoned DIY enthusiast, wiring a 5 pin rocker switch can be a simple and straightforward process. With the right tools and a little bit of know-how, you’ll be able to control various electrical devices with ease.

Related Post Wiring Diagram For Furnace Thermostat
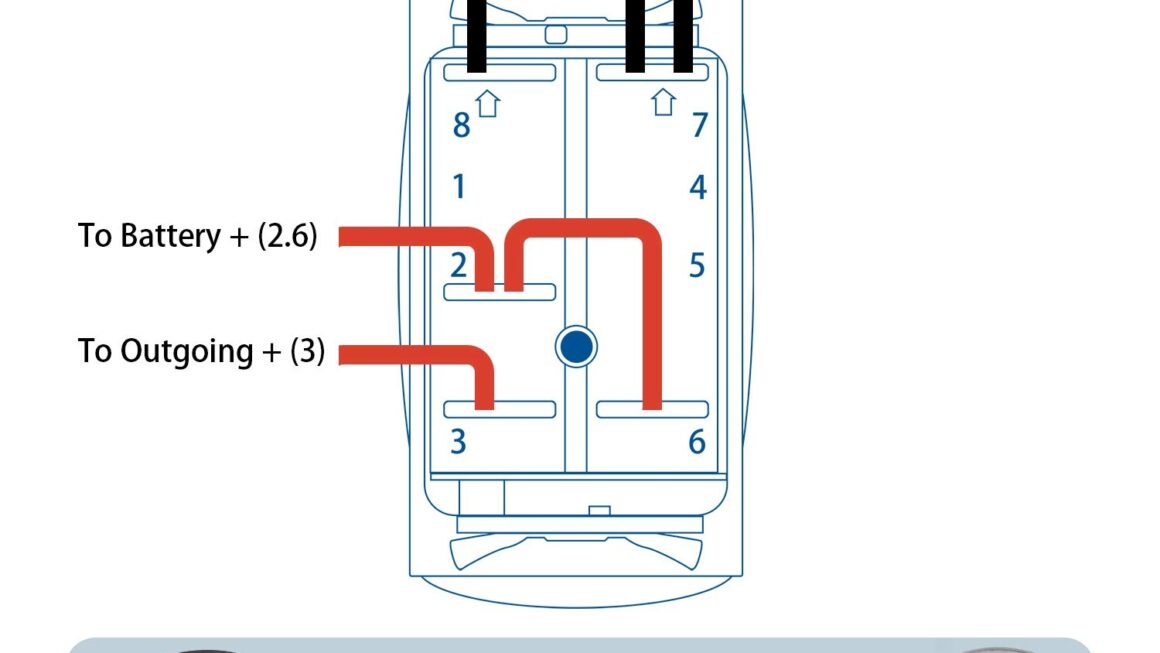
To wire up your 5 pin rocker switch, start by connecting the power source to terminal 3 (COM). Next, connect the device you want to control to either terminal 1 or 2 (NO) depending on whether you want the switch to be normally open or normally closed. Finally, connect the ground wire to terminal 5 and you’re all set!
It’s crucial to double-check your wiring before powering up your circuit to avoid any potential mishaps. Once everything is properly connected, test your rocker switch to ensure it’s functioning correctly. If all is well, you can now enjoy the convenience of controlling your electrical devices with a simple flick of a switch.
With this easy-to-follow wiring diagram, installing a 5 pin rocker switch is a breeze. Whether you’re looking to upgrade your vehicle’s accessories or add a new switch to your DIY project, this guide will help you get the job done quickly and efficiently. Say goodbye to complicated wiring and hello to smooth and seamless electrical control!
Now that you have the knowledge and know-how to wire up a 5 pin rocker switch, you can tackle your next electrical project with confidence. Remember to always prioritize safety and follow proper wiring procedures to ensure a successful and hassle-free installation. Happy switching!
Download and Print Wiring Diagram For 5 Pin Rocker Switch Listed below