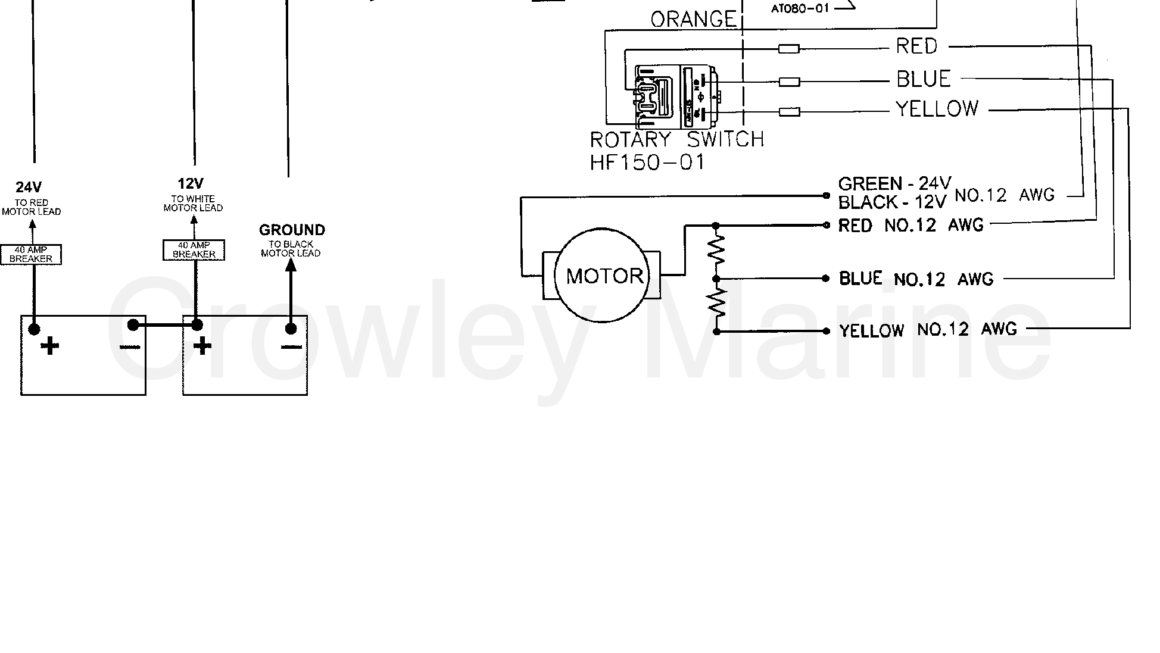
If you’re new to using a trolling motor on your boat, understanding the wiring diagram is essential for smooth operation. Whether you’re replacing an old motor or installing a new one, having a clear understanding of the wiring setup can save you time and frustration.
Wiring a 24-volt trolling motor may seem daunting at first, but with the right guidance, it can be a straightforward process. By following the appropriate wiring diagram, you can ensure that your motor operates efficiently and reliably, giving you a hassle-free boating experience.

Related Post Wiring Diagram Generator Transfer Switch
Start by disconnecting the battery to prevent any electrical accidents. Then, identify the positive and negative terminals on each battery. The positive terminal of one battery should be connected to the negative terminal of the other battery to create a series connection for a 24-volt system.
Next, connect the positive wire from the trolling motor to the positive terminal of one battery and the negative wire to the negative terminal of the other battery. Make sure to secure the connections properly and use heat shrink tubing or electrical tape to insulate them.
Once all the connections are made, double-check the wiring to ensure everything is properly connected. Test the motor to see if it’s running smoothly in both forward and reverse directions. If everything is working correctly, you’re all set to hit the water and enjoy your trolling motor!
In conclusion, understanding the wiring diagram for a 24-volt trolling motor is essential for a successful installation. By following the proper steps and taking necessary precautions, you can ensure a safe and efficient boating experience. So, grab your gear, head out on the water, and let your trolling motor take you on an adventure!
Download and Print Wiring Diagram For A 24 Volt Trolling Motor Listed below