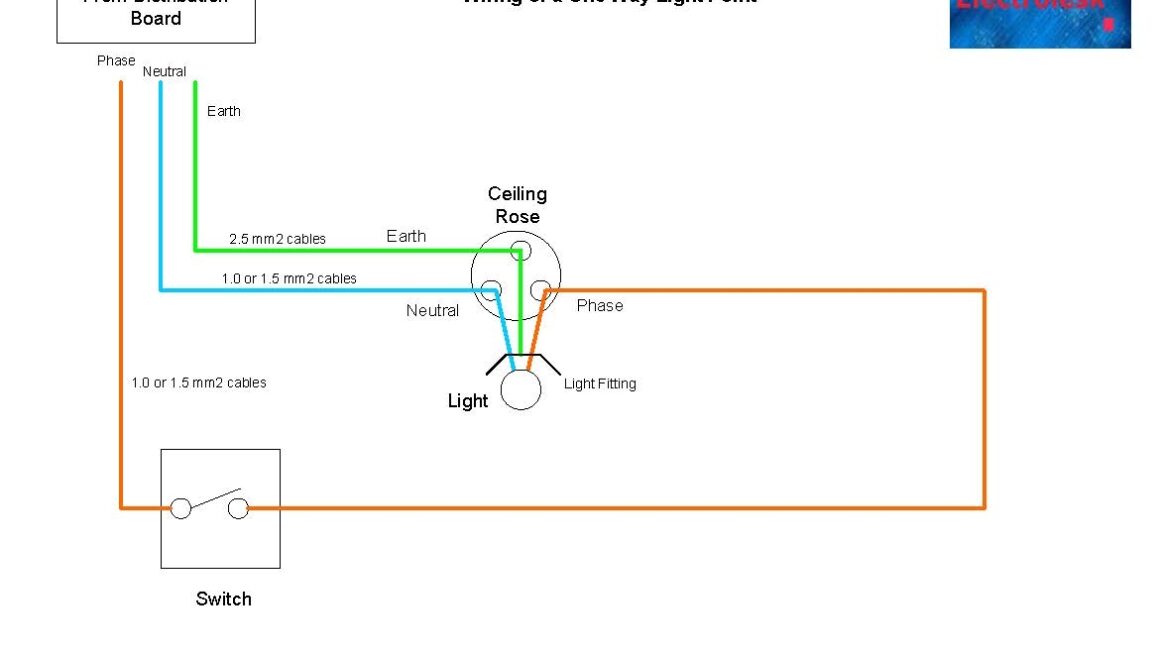
Are you looking to install a new switch in your home but not sure how to wire it up? Don’t worry, we’ve got you covered with a simple and easy-to-follow wiring diagram!
Whether you’re a beginner or just need a refresher, understanding how to wire a switch is essential for any DIY project. With the right tools and a little know-how, you’ll have that switch up and running in no time.

Related Post Nema 14 50 Wiring Diagram
Identify the hot wire (usually black), the neutral wire (usually white), and the ground wire (usually green or bare copper). Use a voltage tester to double-check that the power is off before proceeding.
Now, it’s time to connect the wires to the switch. Typically, you’ll connect the hot wire to the brass screw, the neutral wire to the silver screw, and the ground wire to the green screw. Make sure to tighten the screws securely.
Once the wires are connected, carefully tuck them back into the wall box and secure the switch in place with the screws provided. Finally, replace the cover plate and turn the power back on to test your new switch. Voila, you’re done!
Now that you have a better understanding of how to wire a switch, you can confidently tackle your next home improvement project. Remember, if you ever feel unsure or uncomfortable working with electricity, it’s always best to call a professional electrician for help. Stay safe and happy DIY-ing!