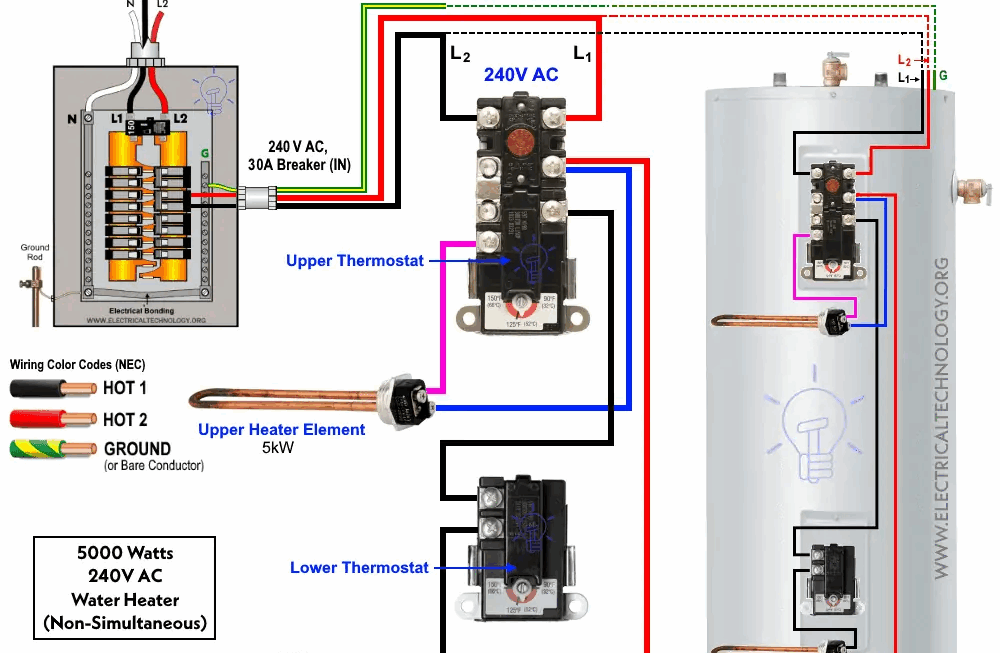
If you’re looking to install a water heater in your home, having a wiring diagram is crucial to ensure everything is connected correctly. Without the proper wiring, your water heater may not function properly, leading to potential issues down the line.
Understanding the wiring diagram for a water heater is not as complicated as it may seem. With a bit of guidance and the right tools, you can easily follow along and complete the installation with confidence.

Related Post 1980 Pontiac Firebird Trans Am Dash Wiring Diagram
Next, familiarize yourself with the different wires and their corresponding terminals. Typically, there will be a black wire for power, a white wire for neutral, and a green or bare wire for ground. Make sure to double-check the diagram to confirm which wire goes where.
Before you begin the wiring process, be sure to turn off the power to the water heater at the circuit breaker. This will prevent any accidents or injuries while working on the electrical components. Safety should always be a top priority when dealing with electricity.
Once you have identified the wires and turned off the power, you can start connecting them according to the wiring diagram. Take your time and double-check each connection to ensure everything is secure and in the right place. A mistake at this stage could lead to potential hazards.
After you have completed the wiring process, you can turn the power back on and test the water heater to ensure it is working correctly. If everything is in order, you can relax knowing that you successfully installed your water heater with the help of the wiring diagram.
In conclusion, having a clear understanding of the wiring diagram for a water heater is essential for a successful installation. By following the diagram carefully and taking the necessary safety precautions, you can enjoy the benefits of a properly functioning water heater in your home.
Download and Print Wiring Diagram For A Water Heater Listed below