Are you looking for a reliable way to ensure your battery stays charged and your electrical system is protected? A battery isolator might be the solution you need. By using a wiring diagram for battery isolator, you can easily set up this device and enjoy its benefits.
With a battery isolator, you can prevent your main starting battery from draining when running accessories like lights or a sound system. This ensures that you always have enough power to start your vehicle, even after extended use of these accessories.

Related Post 3 Wire Condenser Fan Motor Wiring Diagram
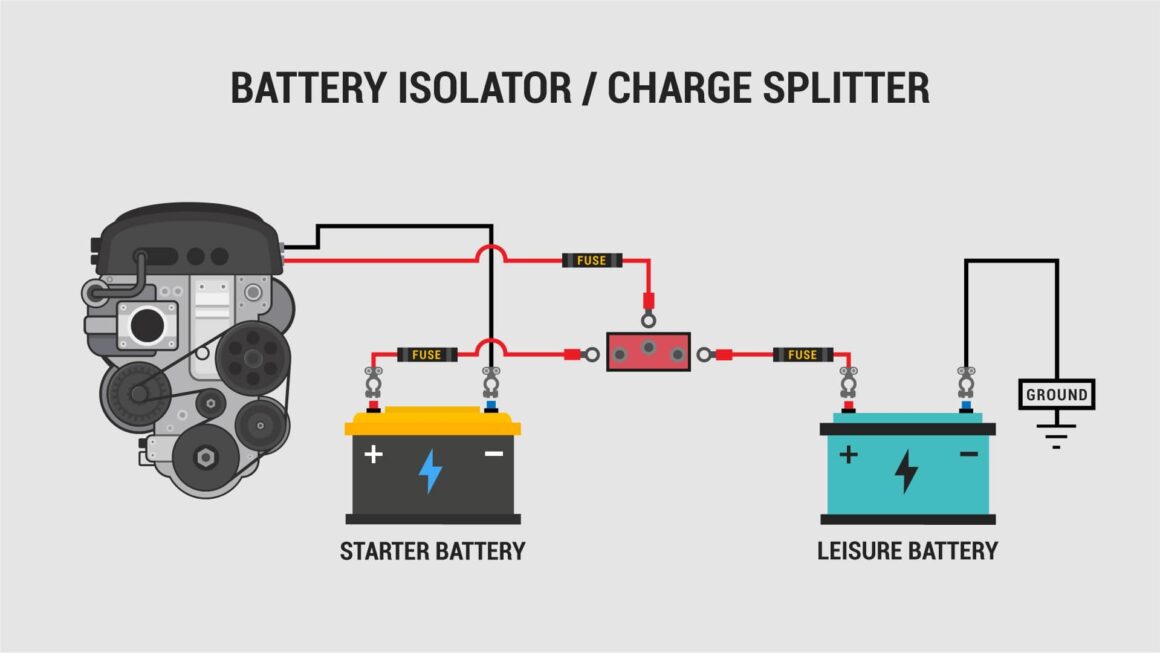
Start by disconnecting the negative terminal of your main battery and connecting it to the isolator. Then, connect the positive terminal of the main battery to the isolator. Next, connect the auxiliary battery to the isolator, making sure to follow the correct polarity.
Finally, connect the isolator to the alternator using the appropriate wires. Once everything is connected according to the wiring diagram, you can test the system to ensure it’s working properly. Make any necessary adjustments before securing all connections.
By following a wiring diagram for battery isolator, you can easily set up this device and enjoy the benefits of a reliable power source for your vehicle’s accessories. With proper installation, you can rest assured that your batteries are protected and your electrical system is functioning efficiently.
Don’t let a drained battery ruin your day. With a battery isolator and the right wiring diagram, you can keep your electrical system in top condition and ensure you always have the power you need when you need it. Get started on your installation today and enjoy peace of mind on the road!
Download and Print Wiring Diagram For Battery Isolator Listed below