If you’re looking to upgrade your vehicle’s charging system, understanding how to wire a one-wire alternator is key. This simple yet powerful component can make a big difference in your car’s performance.
With just one wire connecting the alternator to the battery, this setup is perfect for those looking for a straightforward solution. Say goodbye to complicated wiring diagrams and hello to a more efficient charging system.

Related Post Wiring Electric Trailer Brakes Diagram
First, disconnect the negative terminal of the battery to prevent any accidents. Then, locate the output terminal on the alternator and connect it to the positive terminal of the battery using a heavy-gauge wire. This direct connection ensures maximum charging efficiency.
Next, connect the alternator’s ground terminal to a clean and solid grounding point on the vehicle’s body or engine block. This completes the circuit and ensures proper operation of the alternator. Make sure all connections are secure and free from any damage or corrosion.
Finally, start the engine and check the alternator’s output voltage to ensure it is within the manufacturer’s specifications. If everything looks good, you’re all set to enjoy the benefits of your new one-wire alternator. Say goodbye to charging issues and hello to a more reliable electrical system.
In conclusion, wiring a one-wire alternator is a simple and effective way to upgrade your vehicle’s charging system. With just a few basic steps, you can enjoy improved performance and reliability. So why wait? Give it a try today and experience the difference for yourself.
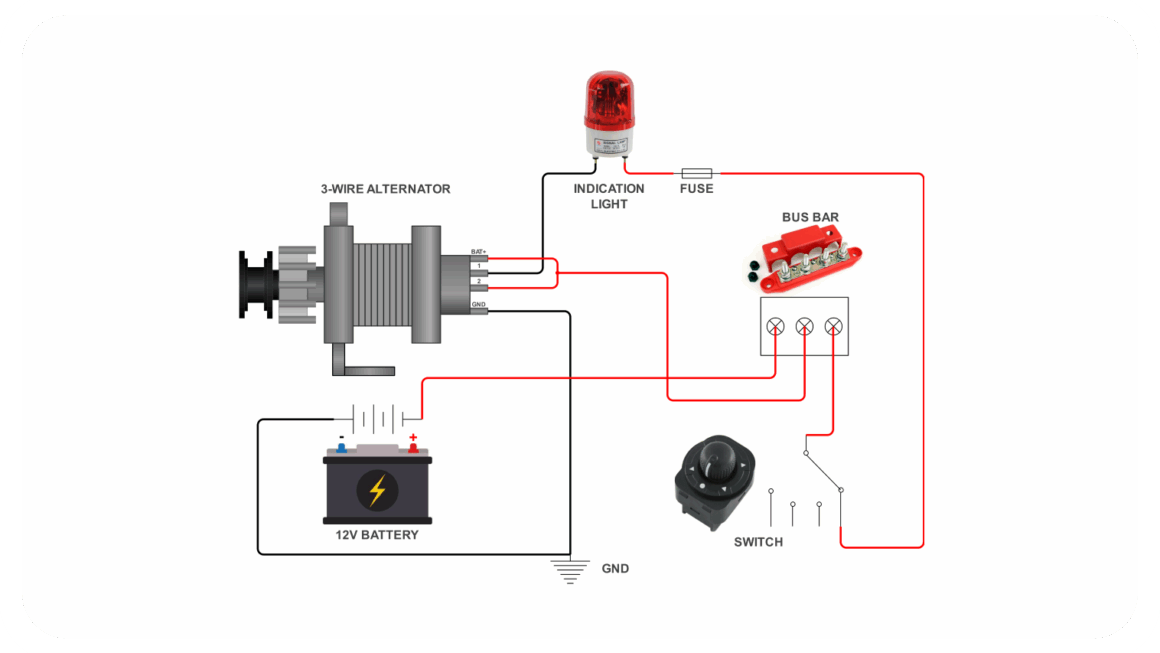
Download and Print Wiring Diagram For One Wire Alternator Listed below