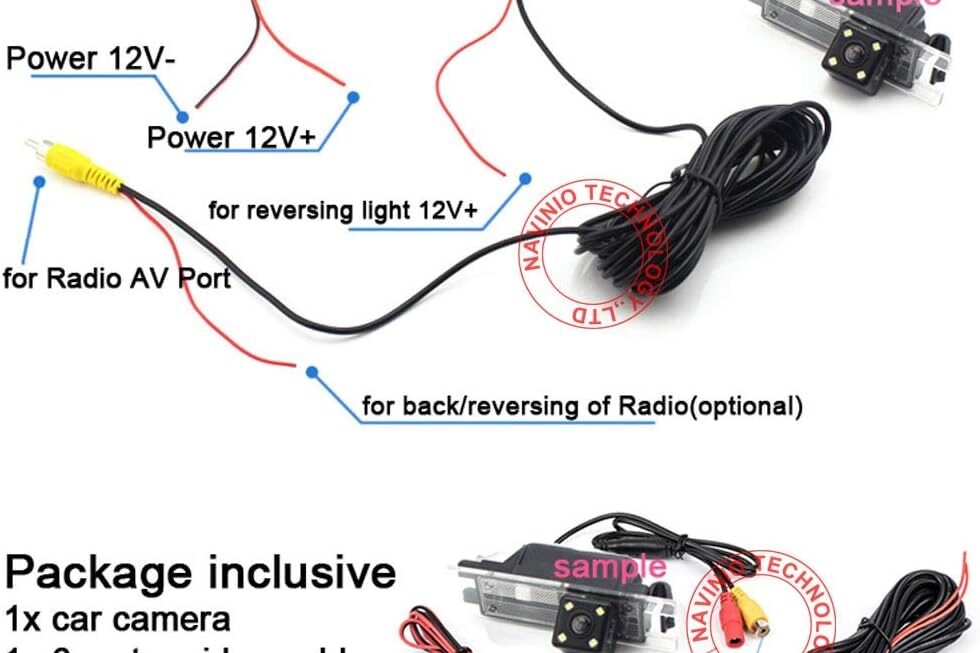
If you’re looking to install a rear view camera in your vehicle, having a clear wiring diagram is essential. Without the proper guidance, you may end up with a tangled mess of wires and a non-functioning camera.
Understanding the wiring diagram for a rear view camera can seem daunting at first, but with a little patience and some basic knowledge of electrical systems, you can successfully set up your camera without any hiccups.

Related Post Wiring Diagram For Switch Outlet Combo
Next, you’ll need to connect the camera’s power wire to the power source you identified earlier. Make sure to use the appropriate connectors and secure the connections with electrical tape to prevent any loose wires.
Once the power is connected, you’ll need to run the video cable from the camera to the display unit in your vehicle. This may involve routing the cable through the interior of your car, so be prepared to remove panels or trim pieces if necessary.
Finally, connect the video cable to the display unit, following the manufacturer’s instructions for your specific camera model. Once everything is connected, test the camera to ensure it’s functioning properly before reassembling any interior panels you removed during the installation process.
With a clear understanding of the wiring diagram for your rear view camera and a little bit of patience, you can easily install this useful device in your vehicle. Enjoy the added safety and convenience of having a rear view camera to assist you while backing up!
Download and Print Wiring Diagram For Rear View Camera Listed below