If you’re looking to install a rocker switch in your DIY project, having a wiring diagram is essential to ensure everything is connected correctly. Understanding how to wire a rocker switch can make the installation process much smoother and hassle-free.
Whether you’re working on a custom lighting setup for your vehicle or adding a new switch to your home automation system, having the right wiring diagram for a rocker switch is crucial. This guide will walk you through the steps to wire a rocker switch properly.

Related Post Chrysler Town And Country Uconnect 430N Rhb Wiring Diagram
Start by cutting the power to the circuit you’ll be working on to avoid any accidents. Next, carefully strip the insulation off the wires according to the lengths specified in the wiring diagram. Connect the wires to the appropriate terminals on the rocker switch, following the diagram’s instructions.
Once all the wires are securely connected, double-check your work to ensure everything is properly aligned. Insulate any exposed wires with electrical tape to prevent short circuits. Turn the power back on and test the rocker switch to make sure it’s functioning correctly.
With the wiring diagram for your rocker switch in hand and following the steps outlined in this guide, you’ll be able to install your rocker switch with confidence. Remember to always prioritize safety when working with electrical components and consult a professional if you’re unsure about any step in the process.
By following these simple instructions and using the correct wiring diagram, you can successfully wire a rocker switch for your project. Enjoy the convenience and control that a rocker switch can provide in your DIY endeavors!
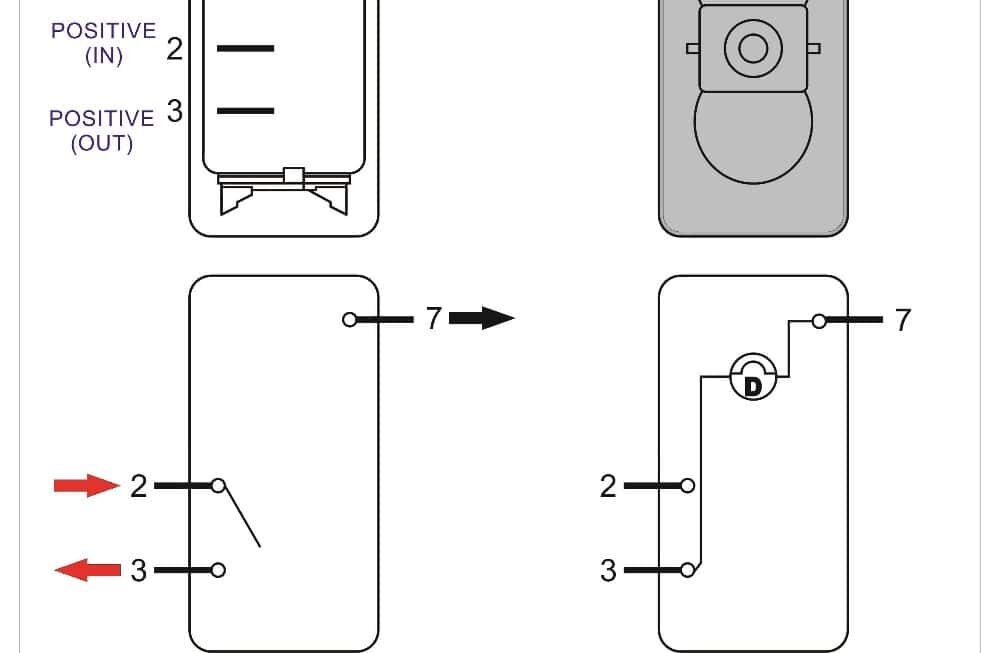
Download and Print Wiring Diagram For Rocker Switch Listed below