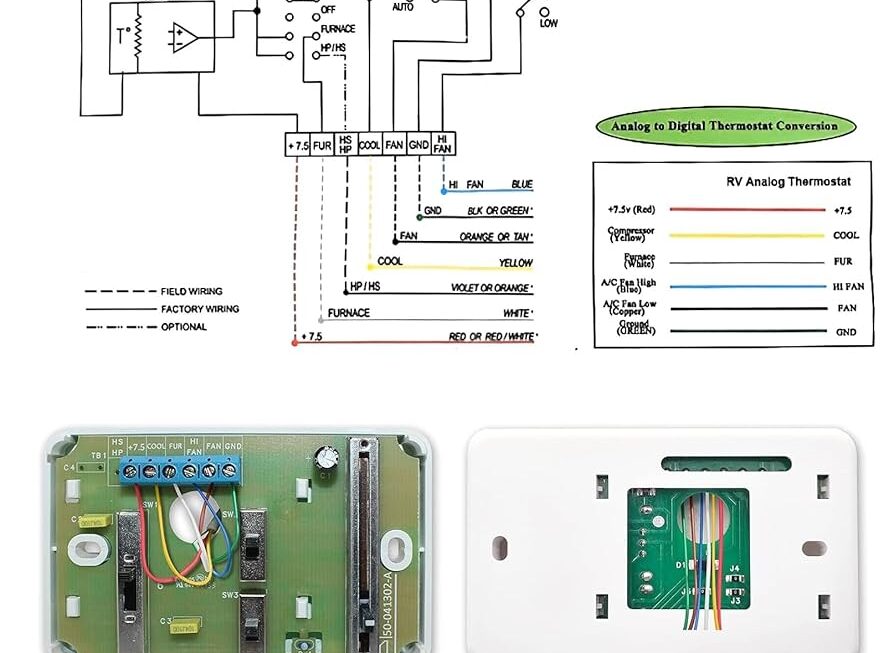
Planning to install a thermostat in your RV but not sure how to wire it up? Don’t worry, we’ve got you covered with a simple and easy-to-follow wiring diagram for your RV thermostat.
Whether you’re looking to upgrade your current thermostat or replace a faulty one, having a clear wiring diagram can make the installation process a breeze. With the right tools and a little bit of know-how, you’ll have your new thermostat up and running in no time.

Related Post 5 Channel Amp Wiring Diagram
Next, refer to the wiring diagram provided with your new thermostat. This diagram will show you which wires should be connected to each terminal on the new thermostat. Make sure to match the wires according to the diagram to ensure proper functionality.
If you’re unsure about any of the connections, don’t hesitate to consult the manufacturer’s instructions or seek help from a professional. It’s better to be safe than sorry when it comes to electrical wiring. Once you’ve double-checked all the connections, secure the thermostat in place and restore power to your HVAC system.
Now that you’ve successfully installed your new RV thermostat, you can enjoy comfortable temperatures on your next road trip. With the right wiring diagram and a little bit of patience, you’ll be able to keep your RV cozy no matter where your adventures take you.
Remember to test your new thermostat to ensure that it’s working correctly. If you encounter any issues, don’t hesitate to troubleshoot or seek assistance. Enjoy the convenience and comfort of a properly functioning thermostat in your RV!
With this easy-to-follow wiring diagram for your RV thermostat, you’ll be able to upgrade or replace your thermostat with confidence. Stay comfortable on the road with a properly functioning HVAC system in your RV. Happy travels!
Download and Print Wiring Diagram For Rv Thermostat Listed below