If you’re in need of a wiring diagram for your Schumacher battery charger, you’ve come to the right place. Understanding how to properly wire your charger is crucial to ensure it functions correctly and safely.
With the right wiring diagram, you’ll be able to connect the charger to the power source and battery with ease. This will help you avoid any potential mishaps or damage to your equipment.

Related Post 2 Lamp Ballast Wiring Diagram
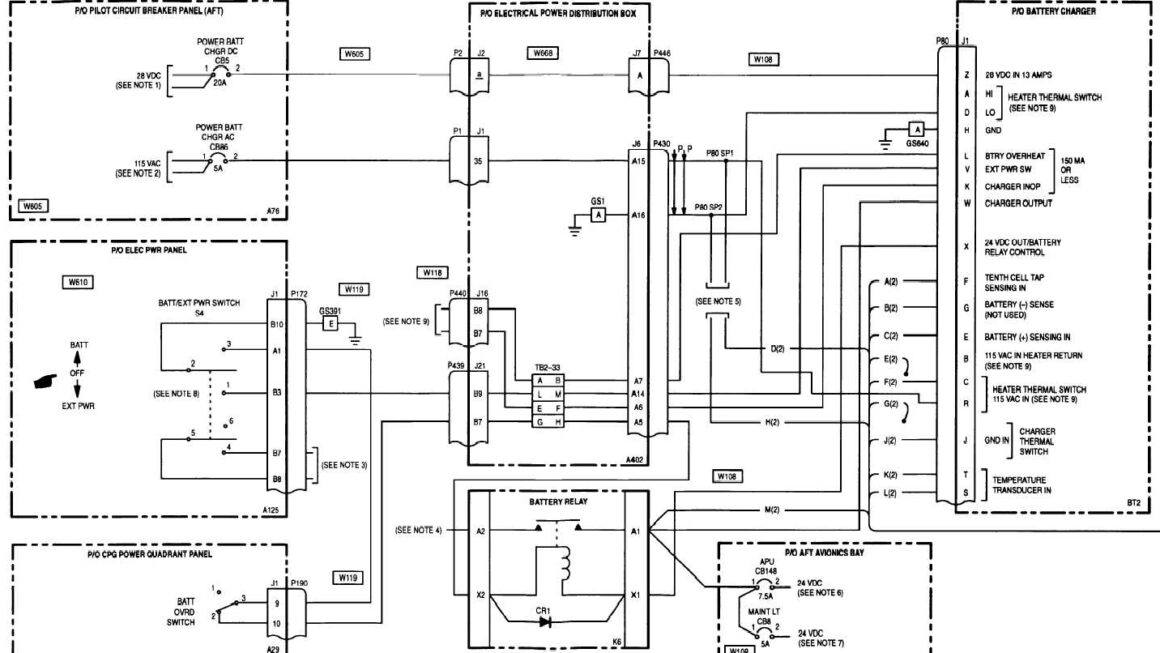
Wiring Diagram For Schumacher Battery Charger
First and foremost, it’s essential to locate the positive and negative terminals on both the charger and the battery. This will ensure that you connect the wires correctly and prevent any short circuits.
Next, refer to the wiring diagram provided with your Schumacher battery charger. This diagram will outline the specific connections you need to make between the charger, battery, and power source.
Follow the instructions carefully, ensuring that you connect the wires securely and in the correct order. Double-check your connections before powering on the charger to avoid any potential issues.
Once you’ve wired everything according to the diagram, you can safely plug in the charger and begin the charging process. Monitor the charger as it works to ensure everything is functioning as it should.
In conclusion, having a proper wiring diagram for your Schumacher battery charger is essential for safe and effective operation. By following the diagram and connecting the wires correctly, you can ensure that your charger works efficiently and prolongs the life of your batteries.
Download and Print Wiring Diagram For Schumacher Battery Charger Listed below