If you’re looking for a reliable thermostat brand, White Rodgers is a popular choice among homeowners. Their thermostats are known for their durability and accuracy, making them a great option for controlling the temperature in your home.
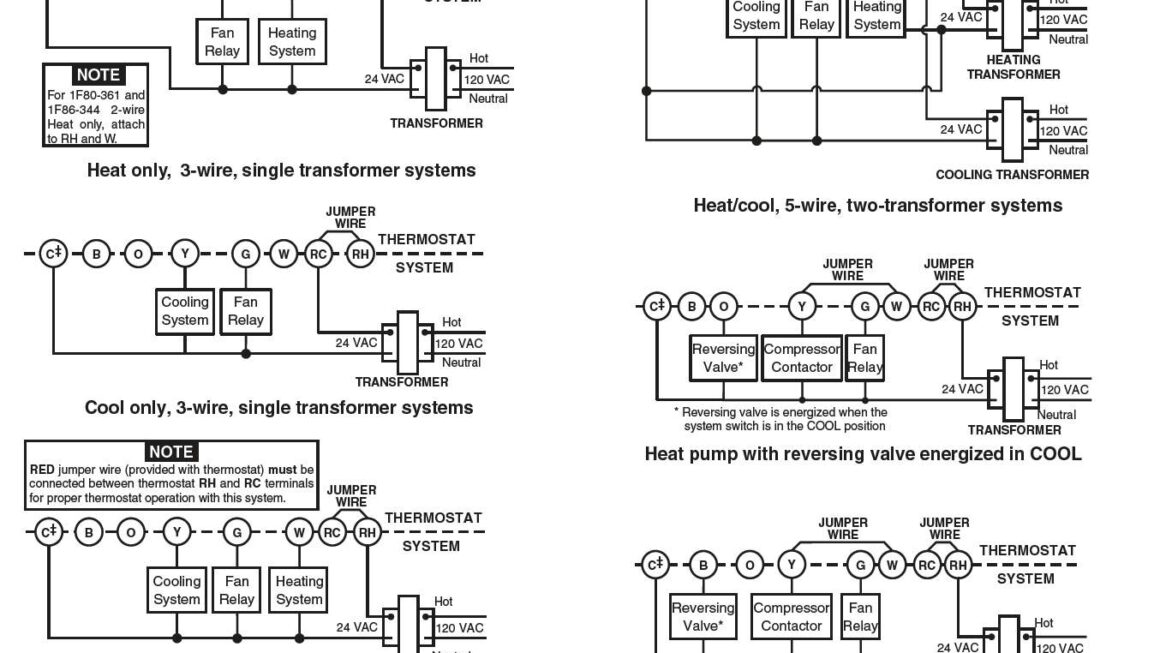
One of the key components of installing a White Rodgers thermostat is understanding the wiring diagram. This diagram shows you how to properly connect the thermostat to your HVAC system, ensuring that it functions correctly.

Related Post A C Unit Capacitor Wiring Diagram
Typically, White Rodgers thermostats have terminals labeled with letters such as R, W, Y, G, and C. These letters correspond to the different wires in your HVAC system, such as the power wire, heating wire, cooling wire, fan wire, and common wire.
By following the wiring diagram carefully, you can ensure that your White Rodgers thermostat is installed correctly and functions properly. If you’re unsure about any of the connections, it’s always best to consult a professional HVAC technician to avoid any potential issues.
Once you have successfully connected all the wires according to the wiring diagram, you can test your White Rodgers thermostat to make sure it is working correctly. Set the desired temperature and monitor your HVAC system to ensure that it responds accordingly.
In conclusion, understanding the wiring diagram for your White Rodgers thermostat is essential for a successful installation. By following the diagram carefully and seeking professional help if needed, you can enjoy the comfort and convenience of a properly functioning thermostat in your home.
Download and Print Wiring Diagram For White Rodgers Thermostat Listed below