If you’re looking to install a new garage door opener, understanding the wiring diagram is essential. Knowing how to properly wire the opener can ensure it functions correctly and safely.
Whether you’re a seasoned DIY enthusiast or a beginner, having a clear wiring diagram can make the installation process much smoother. Let’s dive into the details of a typical wiring diagram for a garage door opener.

Related Post Heat Pump Wiring Diagram Schematic
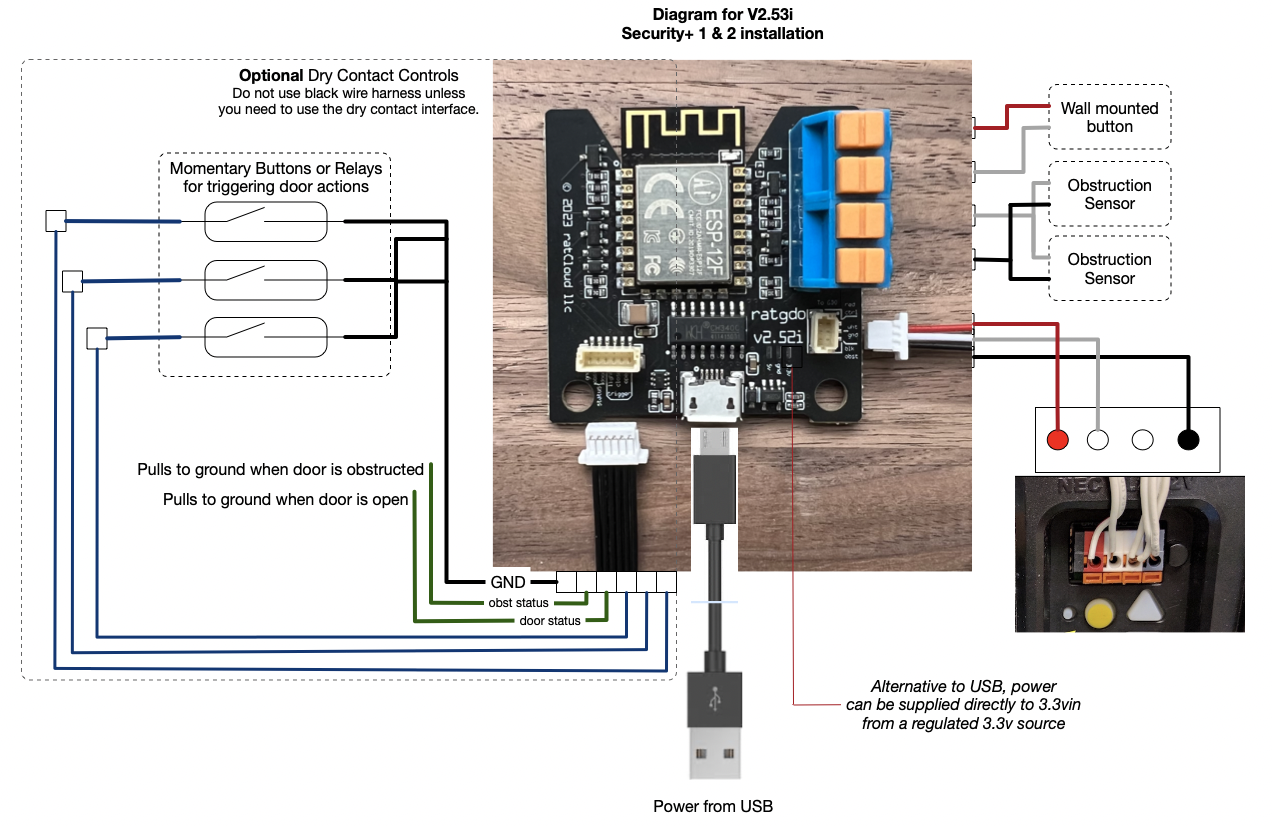
The safety sensor wires are crucial for preventing accidents and injuries. These wires connect the safety sensors near the bottom of the garage door, ensuring that the door stops and reverses if an object or person is in the way.
When following a wiring diagram, it’s important to double-check all connections to avoid any potential hazards. Ensuring that each wire is securely connected and insulated can prevent electrical shorts or malfunctions in the opener system.
If you’re unsure about any part of the wiring process, don’t hesitate to consult a professional or refer to the manufacturer’s instructions. Safety should always be a top priority when working with electrical components.
In conclusion, understanding the wiring diagram for your garage door opener is essential for a successful installation. By following the diagram carefully and paying attention to detail, you can ensure that your opener functions properly and safely for years to come.
Download and Print Wiring Diagram Garage Door Opener Listed below