If you’re a proud owner of an RV, you know how important it is to have a reliable battery setup. Properly wiring your RV battery can make all the difference in ensuring your adventures go smoothly.
Whether you’re a seasoned RVer or just starting out, understanding the wiring diagram for your RV battery hook up is crucial. By following the right setup, you can maximize the efficiency and longevity of your battery.

Related Post Wiring Diagram Hot Water Heater
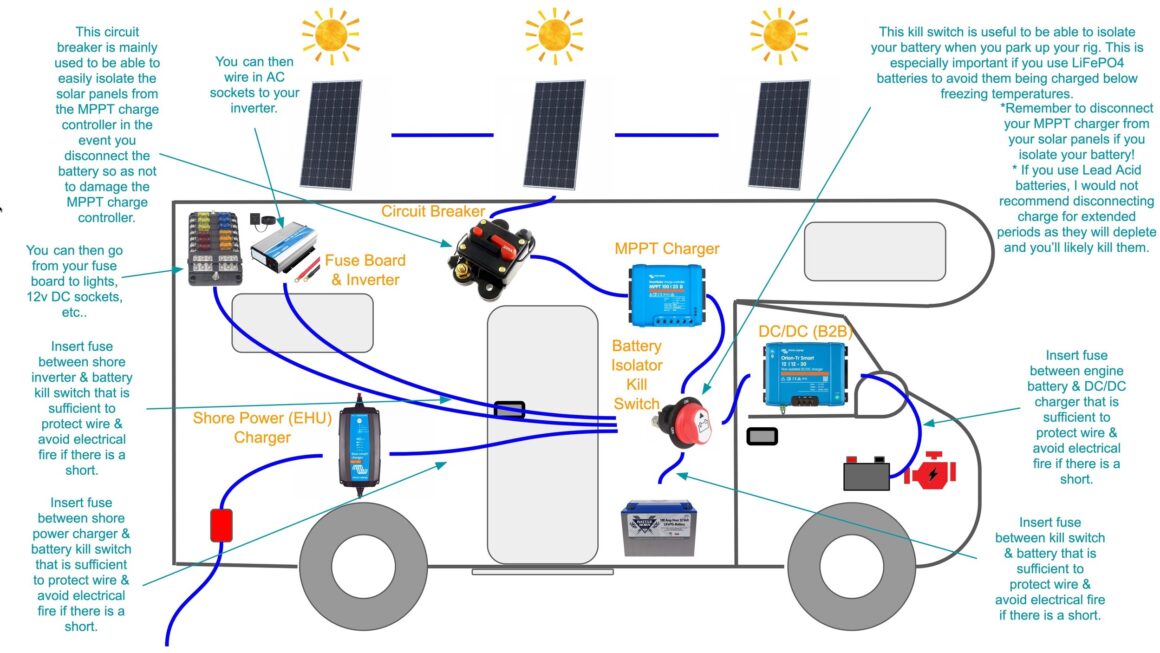
Start by connecting the positive terminal of your RV battery to the positive terminal of the starter battery using a heavy-duty cable. This will ensure that both batteries are charged simultaneously while preventing any power drain when the RV is not in use.
Next, install a battery isolator to prevent the starter battery from draining when the RV battery is in use. This device allows power to flow from the alternator to both batteries but prevents power from flowing back to the alternator when the engine is off.
Don’t forget to add fuses to each cable connection to protect your batteries and electrical system from any potential damage. Properly securing all connections and cables will ensure a safe and reliable setup for your RV battery hook up.
By following the wiring diagram for your RV battery hook up, you can enjoy worry-free adventures on the road. Remember to regularly inspect and maintain your battery setup to prolong its lifespan and keep your RV running smoothly.
In conclusion, understanding the wiring diagram for your RV battery hook up is essential for a seamless and efficient power supply. By following the right steps and using the proper materials, you can ensure a reliable setup that will power your adventures for years to come.
Download and Print Wiring Diagram Rv Battery Hook Up Picture Listed below