Are you looking to upgrade your home’s lighting system? One way to do so is by installing a dimmer switch. These switches allow you to adjust the brightness of your lights to create the perfect ambiance for any room.
One common type of dimmer switch is the 3-way dimmer switch, which can be used in conjunction with 3-way lighting setups. If you’re unsure of how to wire a 3-way dimmer switch, don’t worry – we’ve got you covered with a helpful diagram and step-by-step instructions.

Related Post Wiring Diagram For Three Phase Motor
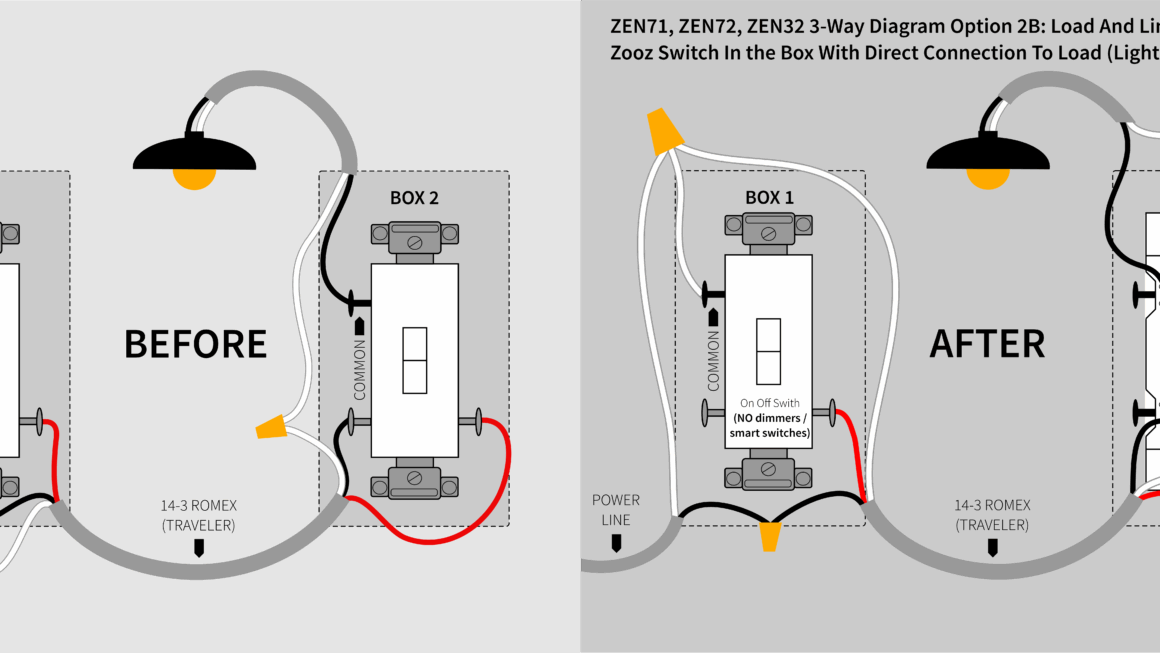
Next, you’ll need to identify the common wire, traveler wires, and ground wire in your electrical box. The common wire is typically black, while the traveler wires are usually red or a different color from the common wire. The ground wire is typically green or bare copper.
Once you’ve identified the wires, you can begin connecting them to the dimmer switch according to the wiring diagram provided. Make sure to secure the wires with wire nuts and wrap them with electrical tape for added safety. Once everything is connected, you can mount the dimmer switch back into the electrical box and turn the power back on to test it out.
If everything is wired correctly, you should now be able to control the brightness of your lights with the 3-way dimmer switch. Remember to always follow the manufacturer’s instructions and local electrical codes when installing any electrical device in your home.
With this easy-to-follow wiring diagram and guide, you can upgrade your home’s lighting system with a 3-way dimmer switch in no time. Enjoy the flexibility and convenience of adjusting your lights to suit your mood and create the perfect atmosphere for any occasion.
Download and Print Wiring Dimmer Switch 3 Way Diagram Listed below