Are you looking to install electric brakes on your trailer but unsure where to start? Don’t worry, we’ve got you covered! In this article, we’ll walk you through the process of wiring electric brakes on your trailer with an easy-to-follow diagram.
Electric brakes are a great addition to any trailer, providing smoother stops and added safety when towing heavy loads. With the right tools and a bit of know-how, you can easily install them yourself.

Related Post Denso 4 Wire O2 Sensor Wiring Diagram
Start by mounting the electric brake assemblies on each wheel of your trailer. Make sure they are securely in place and properly aligned with the brake drums. Next, connect the brake assemblies to the trailer wiring harness using the wire connectors.
After the brake assemblies are connected, it’s time to install the brake controller inside your vehicle. The brake controller is essential for sending signals to the trailer brakes when you apply pressure to the brake pedal.
Finally, connect the brake controller to the trailer wiring harness using the provided wires. Make sure all connections are secure and properly insulated to prevent any electrical issues. Once everything is connected, test the brakes to ensure they are functioning correctly.
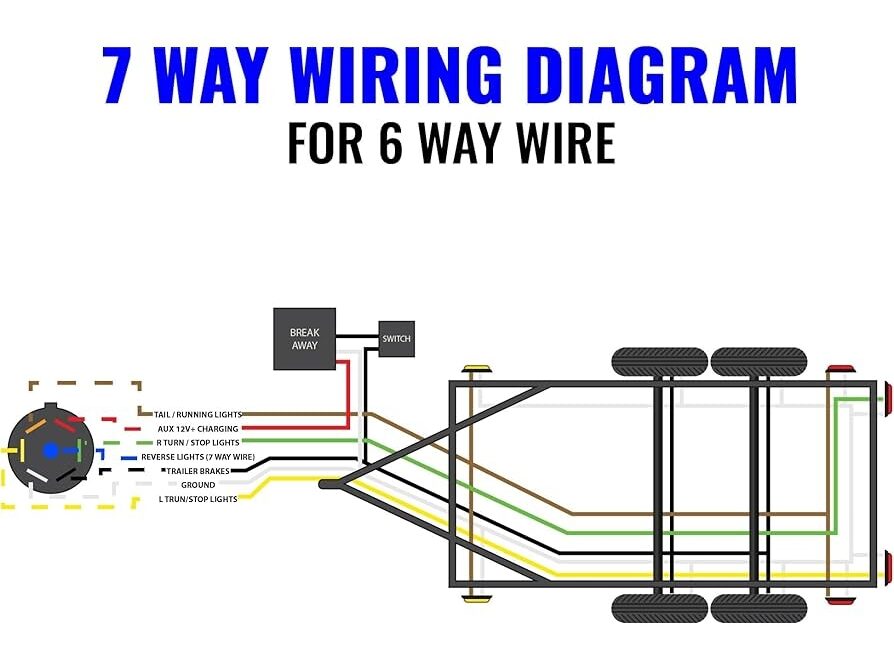
With the wiring electric brakes on trailer diagram as your guide, you’ll be able to install electric brakes on your trailer in no time. Enjoy smoother stops and added safety on the road with this simple and effective upgrade.
So, what are you waiting for? Get started on wiring electric brakes on your trailer today and experience the benefits for yourself. Happy towing!
Download and Print Wiring Electric Brakes On Trailer Diagram Listed below