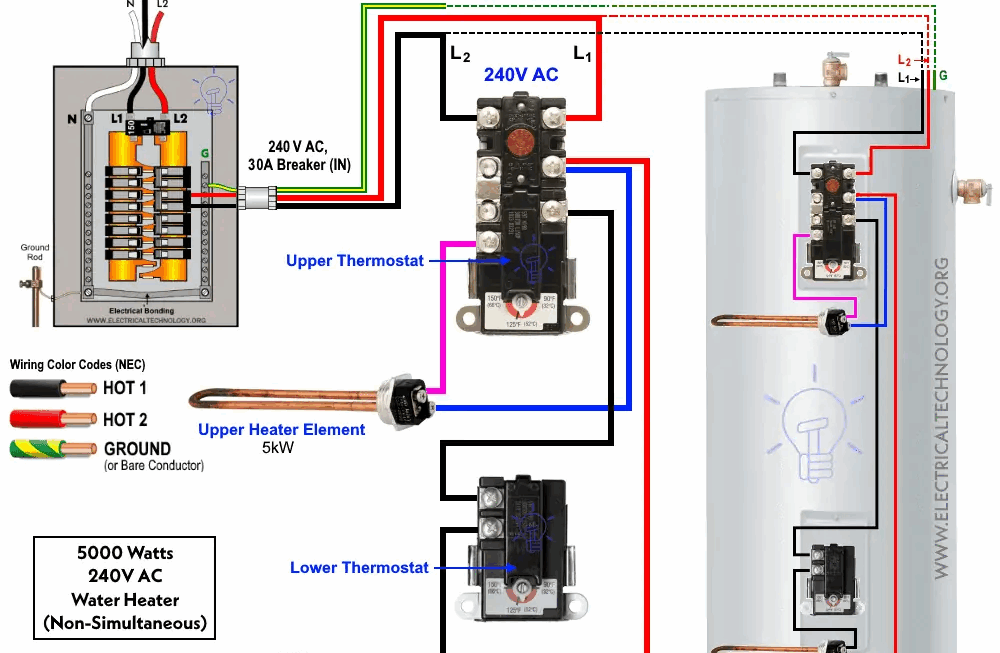
Looking to install or replace your electric water heater? Understanding the wiring diagram is crucial to ensure a safe and successful installation. Let’s break it down and simplify the process for you.
Before diving into the wiring diagram, make sure to turn off the power to the water heater at the breaker box. Safety first! Once that’s done, you can proceed with confidence.

Related Post Driver Side Power Window Switch Wiring Diagram
Next, locate the thermostat on the water heater. This is where the wiring connections will be made. Follow the manufacturer’s instructions carefully to ensure the proper installation of the wiring.
It’s important to double-check all connections before powering up the water heater. A loose connection can lead to overheating and potential damage. Take your time and be thorough in your installation process.
Once everything is connected properly, you can turn the power back on and test the water heater. If all goes well, you should have hot water flowing in no time. Congratulations on a job well done!
Remember, if you ever feel unsure about any part of the installation process, don’t hesitate to call a professional electrician. It’s better to be safe than sorry when it comes to electrical work.
Now that you have a better understanding of the wiring electric water heater diagram, you can tackle this project with confidence. Just remember to prioritize safety, follow the instructions carefully, and double-check your connections. You’ve got this!
Download and Print Wiring Electric Water Heater Diagram Listed below