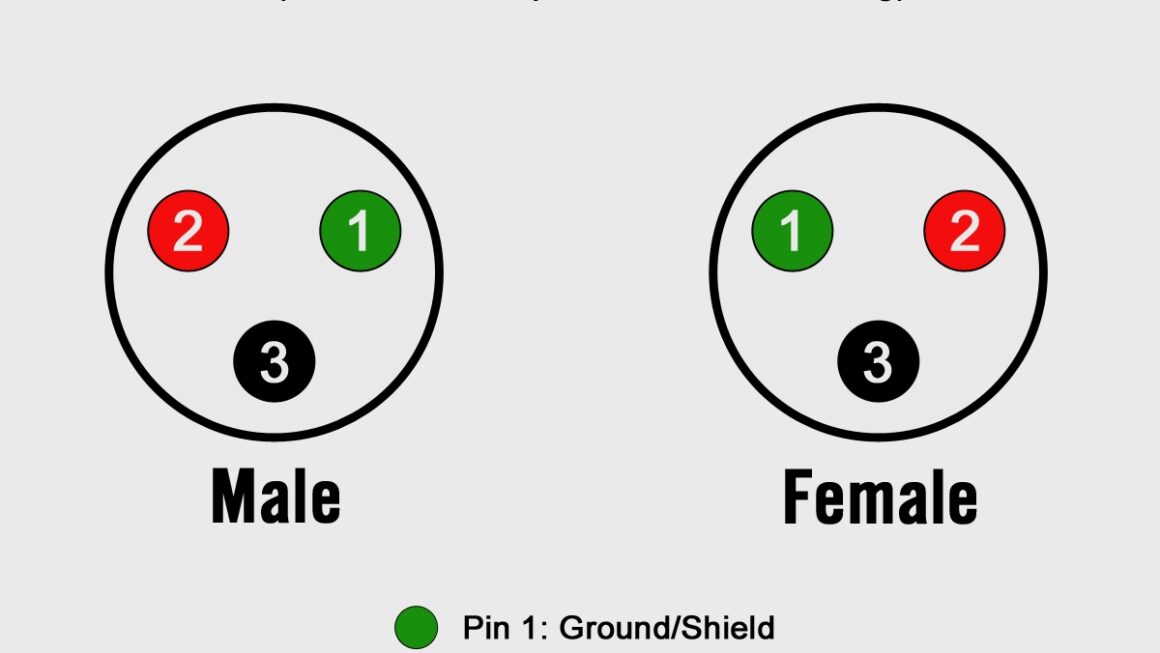
Looking to wire up your XLR cables but not sure where to start? Don’t worry, we’ve got you covered! In this article, we’ll walk you through the XLR to XLR wiring diagram so you can get your audio equipment set up in no time.
XLR cables are commonly used in professional audio setups for their durability and ability to carry balanced audio signals. Understanding how to wire them correctly is crucial to ensure clear and high-quality sound transmission.

Related Post 2000 Chevy Silverado Ignition Switch Wiring Diagram
Make sure to use the appropriate tools, such as a soldering iron and XLR connectors, to secure the connections properly. It’s also essential to double-check your wiring before testing the cables to avoid any potential issues.
Once you’ve wired up your XLR cables following the correct diagram, you can test them by connecting them to your audio equipment. If everything is wired correctly, you should hear clear and crisp audio coming through your speakers or headphones.
Remember, practice makes perfect when it comes to wiring XLR cables. Don’t get discouraged if it takes a few tries to get it right – the important thing is to stay patient and pay attention to detail to ensure a successful connection.
In conclusion, mastering the XLR to XLR wiring diagram is essential for any audio enthusiast or professional looking to set up their audio equipment properly. By following the steps outlined in this article and taking your time to wire the cables correctly, you’ll be on your way to enjoying high-quality sound in no time. Happy wiring!
Download and Print Xlr To Xlr Wiring Diagram Listed below