Are you looking to install a new phone jack in your home or office? Understanding how to wire a 2-wire phone jack can save you time and money on hiring a professional. With the right tools and a bit of know-how, you can easily tackle this project yourself.
By following a 2-wire phone jack wiring diagram, you can ensure that your phone line is properly connected and functioning. Whether you’re setting up a new landline or replacing an existing jack, having a clear diagram to guide you through the process is essential.

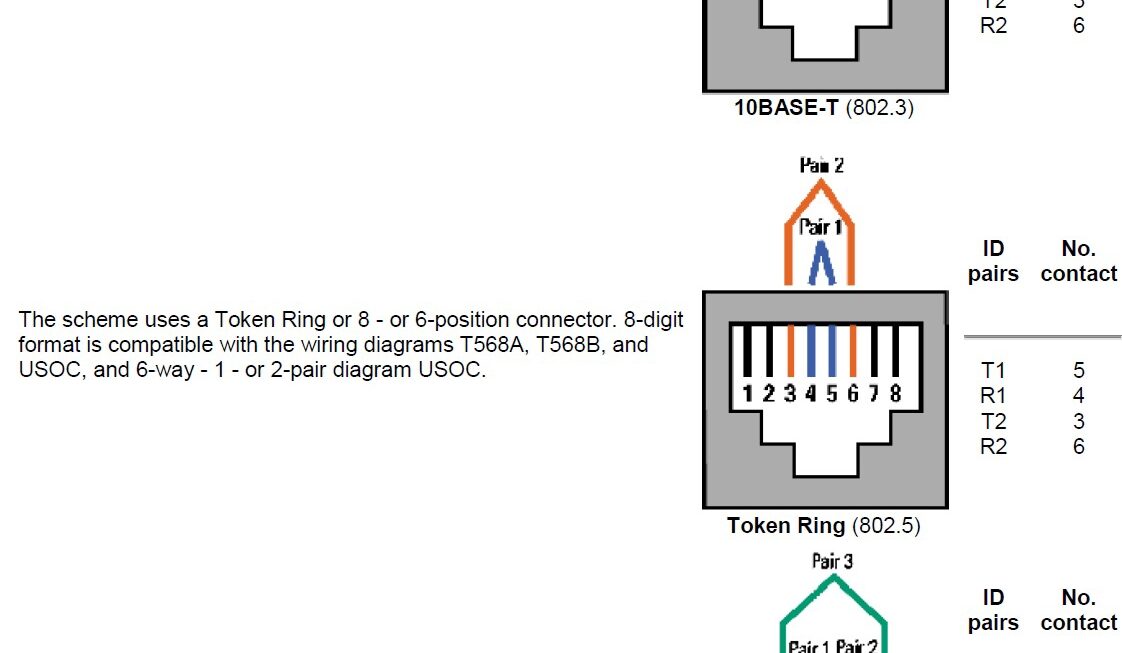
Related Post 1 Phase Motor Wiring Diagram
Connect the red wire to the red terminal on the phone jack and the green wire to the green terminal. Secure the wires in place by tightening the terminal screws with your screwdriver. Once the wires are securely connected, attach the phone jack to the wall or baseboard using the provided screws.
Finally, test your connection by plugging in a phone and making a test call. If you hear a dial tone, congratulations – you’ve successfully wired your 2-wire phone jack! If you encounter any issues, double-check your connections and refer back to the wiring diagram for guidance.
With a bit of patience and attention to detail, anyone can master the art of wiring a 2-wire phone jack. By following a clear and concise wiring diagram, you can confidently tackle this DIY project and enjoy the satisfaction of a job well done.
So, the next time you find yourself in need of a new phone jack, don’t hesitate to roll up your sleeves and get to work. Armed with the right tools and knowledge, you can wire your own 2-wire phone jack like a pro!
Download and Print 2-Wire Phone Jack Wiring Diagram Listed below