Electric baseboard heaters are a popular choice for heating homes, providing efficient and consistent warmth. If you’re looking to install a 240V electric baseboard heater, having a wiring diagram is essential to ensure proper installation.
Understanding how to wire a 240V electric baseboard heater can seem daunting, but with the right diagram and a few basic tools, it can be a straightforward process. By following the wiring diagram carefully, you can safely and effectively install your heater.

Related Post Stop Turn Tail Light Wiring Diagram
Consult the wiring diagram to identify the correct wires for the power supply, thermostat, and heater unit. Carefully connect each wire according to the diagram, ensuring a secure and tight connection. Double-check your work before restoring power to the circuit.
Once the heater is properly wired and secured in place, you can test it to ensure everything is functioning correctly. Turn on the power and adjust the thermostat to your desired temperature. If the heater is producing heat as expected, congratulations – you’ve successfully installed your 240V electric baseboard heater!
Remember to always prioritize safety when working with electrical wiring. If you’re unsure about any step in the installation process, don’t hesitate to seek help from a professional electrician. With the right tools, knowledge, and a reliable wiring diagram, you can enjoy the comfort and efficiency of your new electric baseboard heater.
Installing a 240V electric baseboard heater may seem intimidating at first, but with the proper guidance and a clear wiring diagram, you can tackle the project with confidence. By following these steps and taking the necessary precautions, you’ll be enjoying a cozy and warm home in no time.
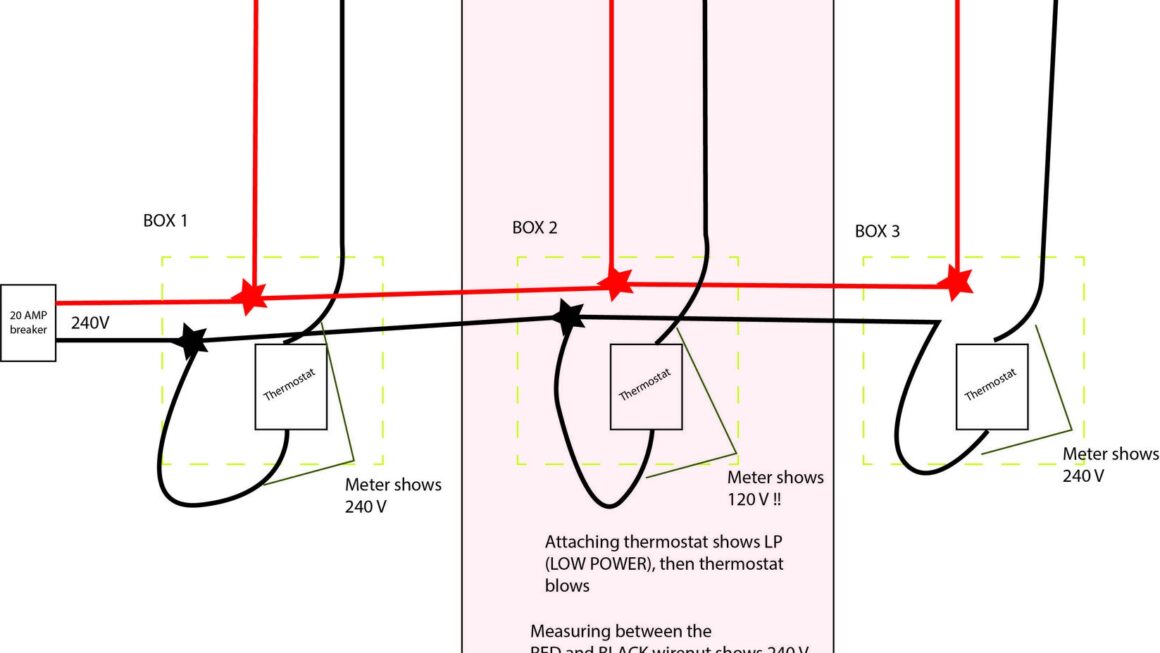
Download and Print 240V Electric Baseboard Heater Wiring Diagram Listed below