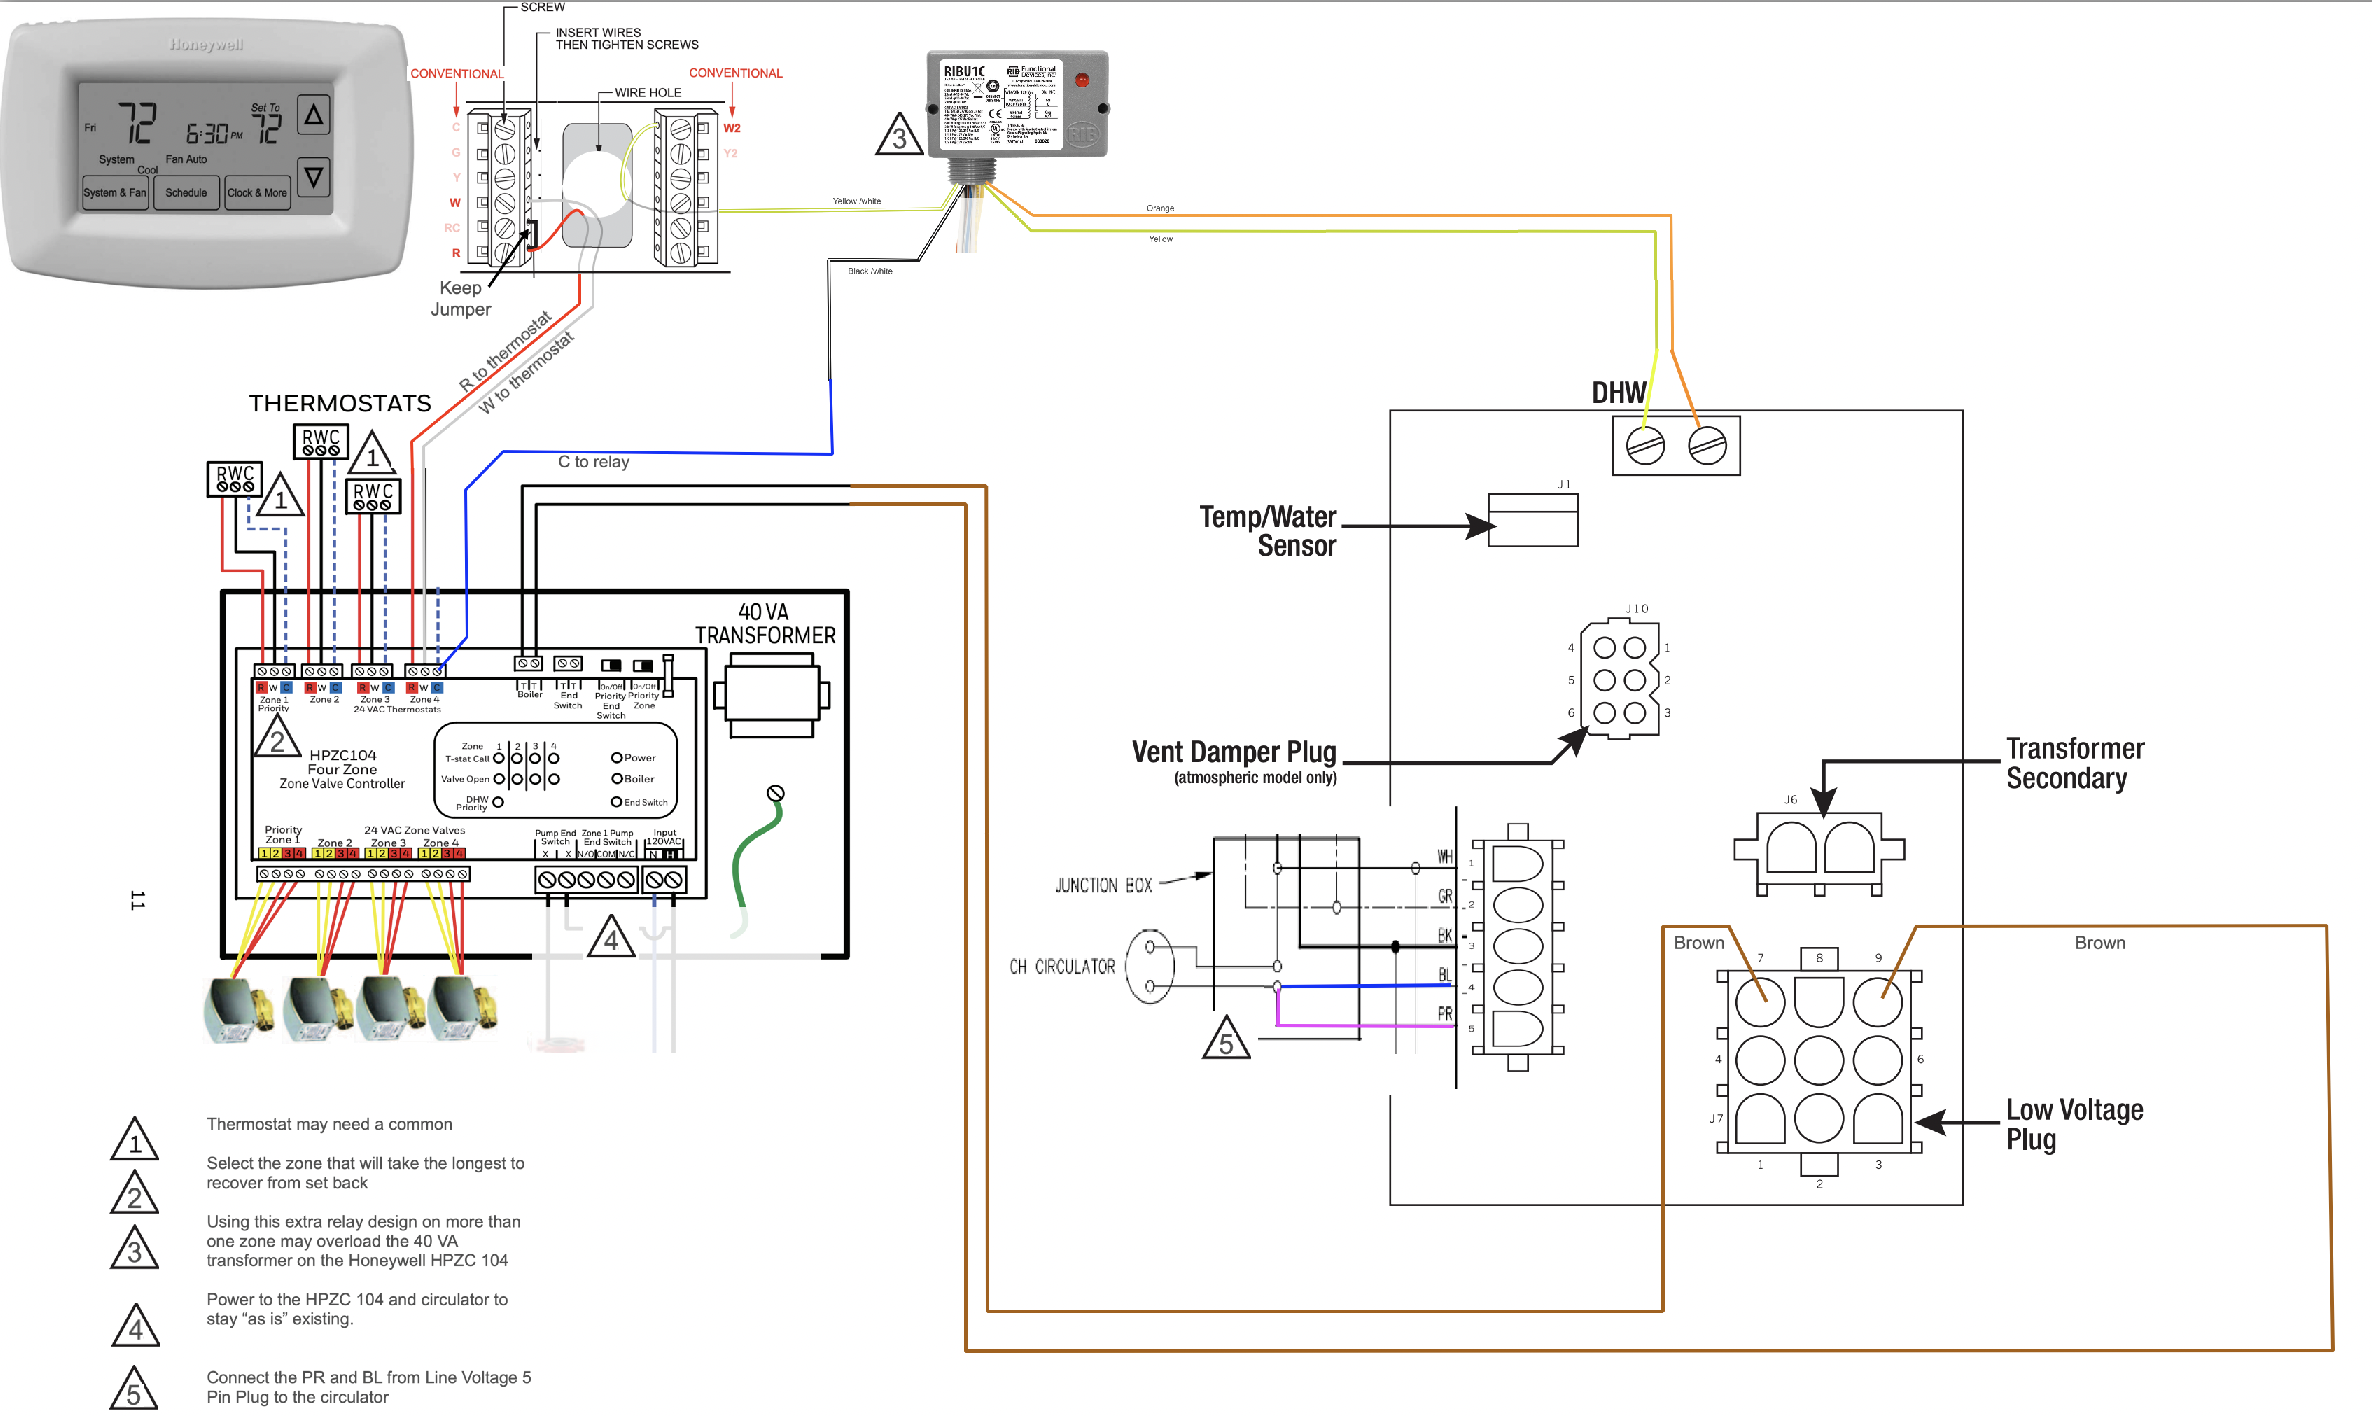
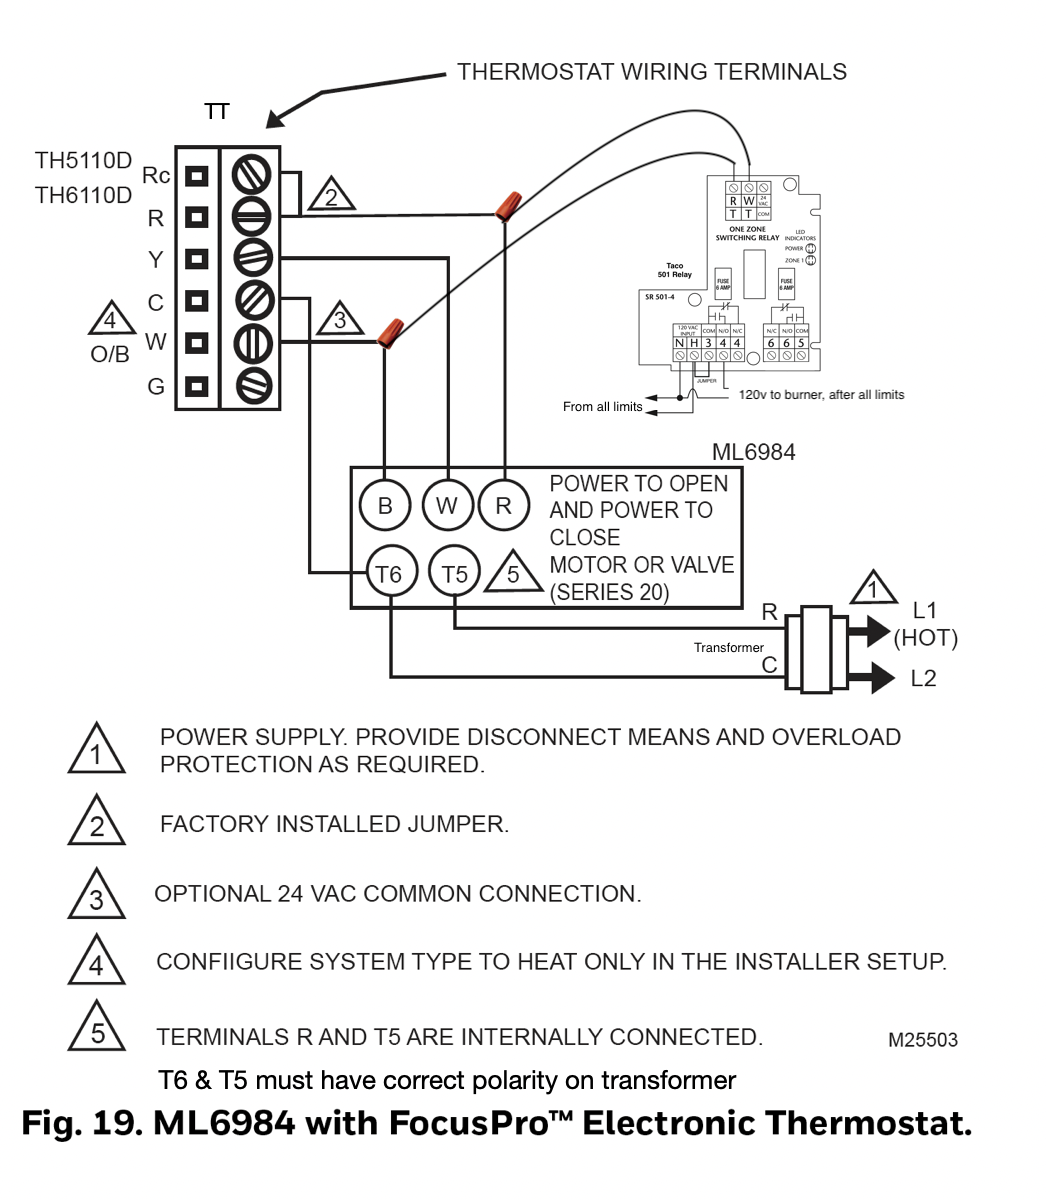
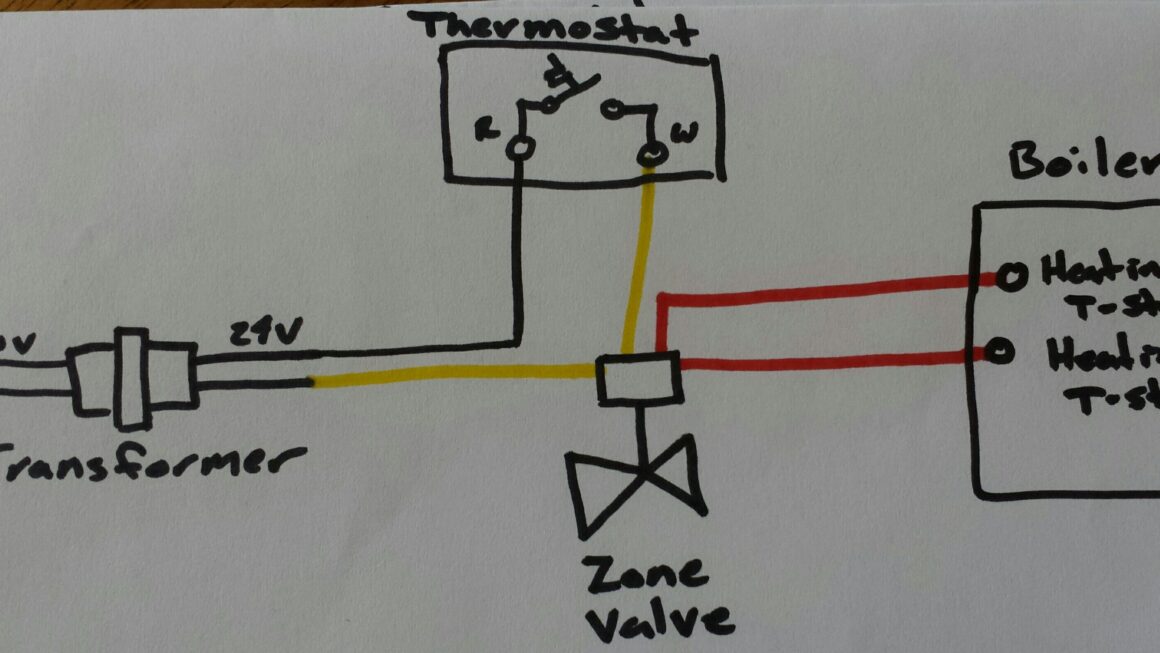
If you’re looking to understand how to wire a 24V zone valve, you’ve come to the right place. This article will guide you through the process in a simple and easy-to-understand way.
Zone valves are an essential component of heating systems, allowing for individual control of different areas or zones within a building. Understanding how to wire them correctly is crucial for proper functioning.

Related Post Ford Truck Side Ford 7 Pin Trailer Wiring Diagram
Start by locating the control panel of your heating system. You will need to identify the terminals for the zone valve and the corresponding wires. It’s essential to follow the manufacturer’s instructions carefully to ensure proper installation.
Next, connect the wires from the zone valve to the appropriate terminals on the control panel. Typically, there will be a common wire, a power wire, and a wire for opening and closing the valve. Make sure to double-check your connections to avoid any issues.
Once you have completed the wiring process, it’s crucial to test the zone valve to ensure it is functioning correctly. You can do this by adjusting the thermostat in the zone you are controlling and verifying that the valve opens and closes as expected.
In conclusion, understanding how to wire a 24V zone valve is essential for the proper functioning of your heating system. By following the steps outlined in this article and consulting the manufacturer’s instructions, you can ensure a successful installation.
Now that you have a better understanding of 24V zone valve wiring, you can confidently tackle this task in your own home. Remember to take your time, double-check your connections, and seek professional help if needed. With the right approach, you’ll have your heating system up and running smoothly in no time.
Download and Print 24V Zone Valve Wiring Diagram Listed below