If you’re looking to add a 3 pin illuminated rocker switch to your DIY project or electrical system, you’ve come to the right place. These switches are not only functional but also look pretty cool with their built-in LED lights.
Before you get started on wiring up your rocker switch, it’s important to have a clear understanding of the process. This article will provide you with a detailed 3 pin illuminated rocker switch wiring diagram to guide you through the installation process.

Related Post Wiring Diagram For A Craftsman Riding Mower
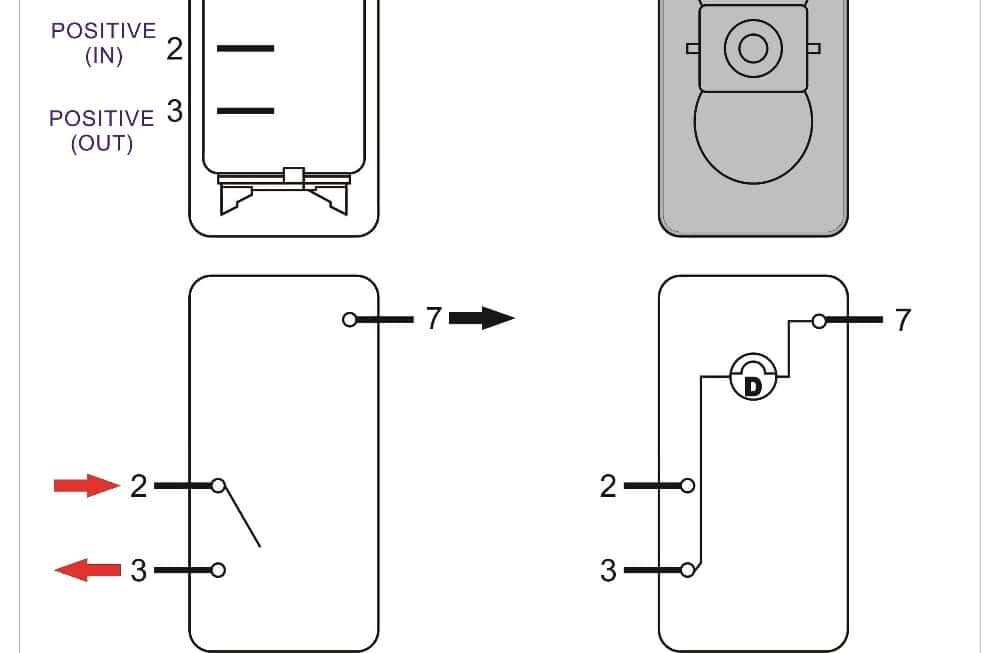
Start by identifying the three pins on the back of the rocker switch. The center pin is the common pin, while the other two pins are for the power source and the device being controlled. Connect the power source to one of the outer pins and the device to the other outer pin.
Next, connect the ground wire to the ground terminal of the power source and the ground terminal of the device. This will ensure that the circuit is properly grounded and functions correctly. Once everything is connected, test the switch to make sure it turns the device on and off as intended.
Remember to always follow safety precautions when working with electrical components. If you’re unsure about any part of the wiring process, don’t hesitate to seek help from a professional or someone with experience in electrical work.
With this 3 pin illuminated rocker switch wiring diagram, you should now be able to confidently install a rocker switch in your project or system. Enjoy the convenience and style that these switches bring to your setup!
Download and Print 3 Pin Illuminated Rocker Switch Wiring Diagram Listed below