If you’re looking to wire a 3 prong generator plug, you’ve come to the right place. Understanding how to correctly wire a generator plug is crucial for ensuring safety and proper functionality. In this article, we’ll walk you through the process step by step.
Before we dive into the 3 prong generator plug wiring diagram, it’s important to gather all the necessary tools and materials. You’ll need a screwdriver, wire strippers, electrical tape, and of course, the 3 prong generator plug itself. Make sure to work in a well-lit area and take necessary safety precautions.

Related Post Wiring Diagram For A Warn Winch
Using your wire strippers, carefully strip off a small amount of insulation from the end of each wire. Then, connect the hot wire (usually black or red) to the hot terminal, the neutral wire (usually white) to the neutral terminal, and the ground wire (usually green) to the ground terminal. Make sure to tighten the screws securely to ensure a proper connection.
Once you’ve connected all the wires to their respective terminals, double-check your work to ensure everything is secure and properly connected. Once you’re confident that everything is in place, plug the generator back into the power source and test it to make sure it’s working correctly.
Remember, if you’re ever unsure about any step in the process, it’s always best to consult a professional electrician for help. Safety should always be the top priority when working with electricity. By following this 3 prong generator plug wiring diagram and taking proper precautions, you can safely and effectively wire your generator plug.
In conclusion, understanding how to wire a 3 prong generator plug is an essential skill for any DIY enthusiast or homeowner. By following the steps outlined in this article and prioritizing safety, you can confidently wire your generator plug and ensure that your generator functions properly. Happy wiring!
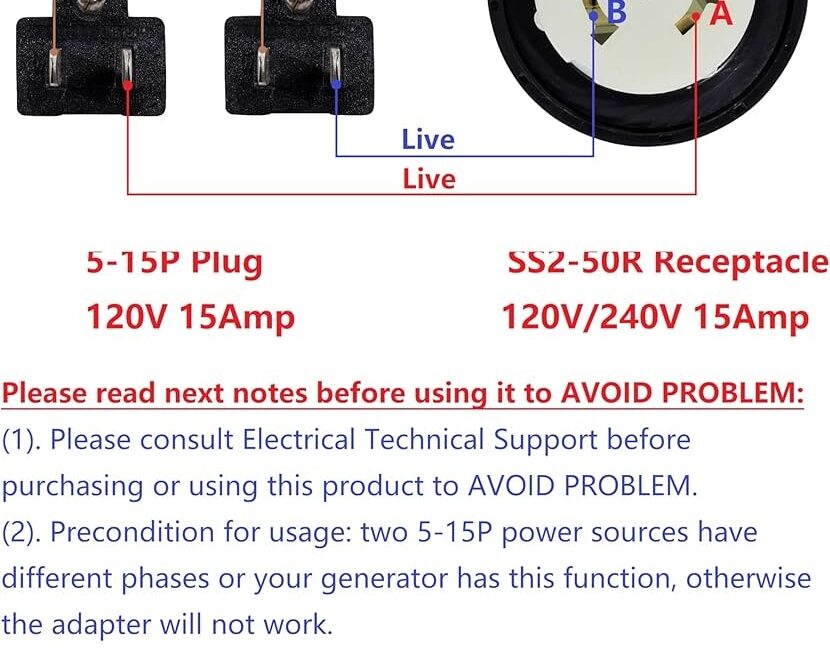
Download and Print 3 Prong Generator Plug Wiring Diagram Listed below

Related Post Ford 7 Way Trailer Plug Wiring Diagram