If you’re looking to install a 3-way switch in your home, understanding the wiring diagram is crucial. This handy guide will walk you through the process step by step.
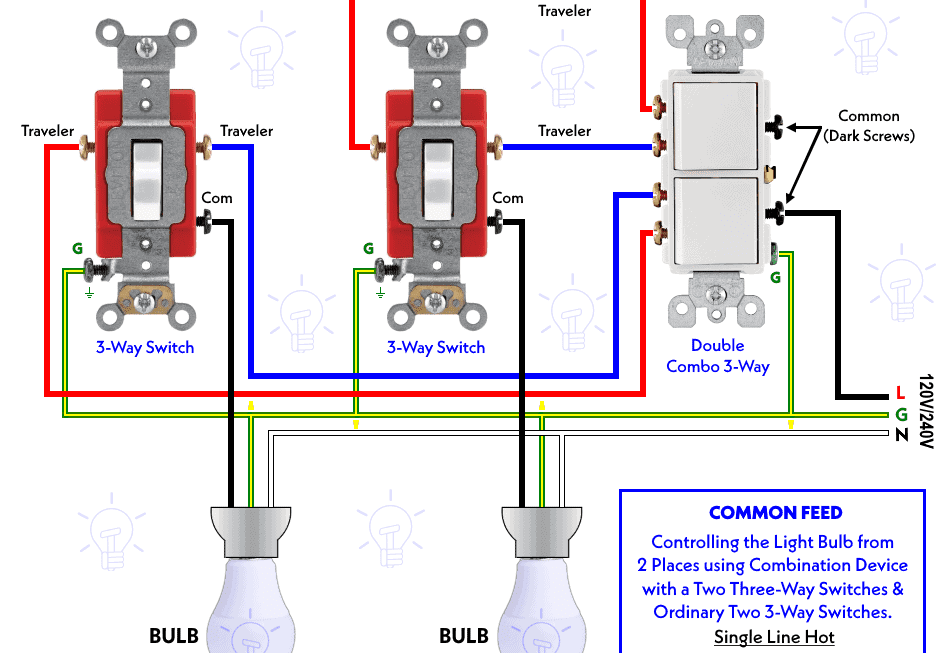
Before diving into the wiring diagram, it’s important to know what a 3-way switch is. Unlike a traditional switch that only has an on/off function, a 3-way switch allows you to control a single light from two different locations.

Related Post Hot Water Heater Wiring Diagram
Start by turning off the power to the circuit you’ll be working on. This is crucial for your safety. Once the power is off, you can begin by identifying the common terminal on each switch and connecting the wires accordingly.
Next, you’ll need to connect the traveler wires between the two switches. This will allow the switches to communicate and control the light fixture. Double-check your connections and secure everything in place before turning the power back on.
Once everything is wired correctly, you can test your 3-way switch to ensure it’s working properly. Flip the switches back and forth to see if the light turns on and off from both locations. If everything checks out, you’re good to go!
In conclusion, understanding the wiring diagram for a 3-way switch is essential for a successful installation. By following the steps outlined in this guide, you’ll be able to wire your switches with confidence and ease.
Download and Print 3-Way Switch Wiring Diagram Pdf Listed below