If you’re looking to upgrade your home’s lighting system, understanding how to wire a 3-way switch with power coming from the light fixture is crucial. This type of setup allows you to control a light from two different locations.
By following a 3-way switch wiring diagram with power at the light, you can easily install this versatile lighting solution in your home. With the right tools and a little know-how, you’ll be able to customize your lighting to fit your needs.

Related Post 2008 Bmw 328Xi Dme Wiring Diagram
Next, you’ll connect the wires at the light fixture to the appropriate terminals. The black wire is the hot wire that carries the electrical current, while the white wire is the neutral wire. The ground wire is typically green or bare copper and provides a path for electrical faults to be safely discharged.
After connecting the wires at the light fixture, you’ll need to install the 3-way switches in the desired locations. One switch will be connected to the power source, while the other will be connected to the light fixture. This setup allows you to control the light from either switch.
Once everything is wired correctly, you can test the switches to ensure they are functioning properly. If the light turns on and off from both locations, congratulations – you’ve successfully wired a 3-way switch with power at the light!
Overall, understanding how to wire a 3-way switch with power at the light is a valuable skill that can enhance the functionality of your home’s lighting. With a bit of patience and practice, you’ll be able to customize your lighting setup to suit your needs and preferences.
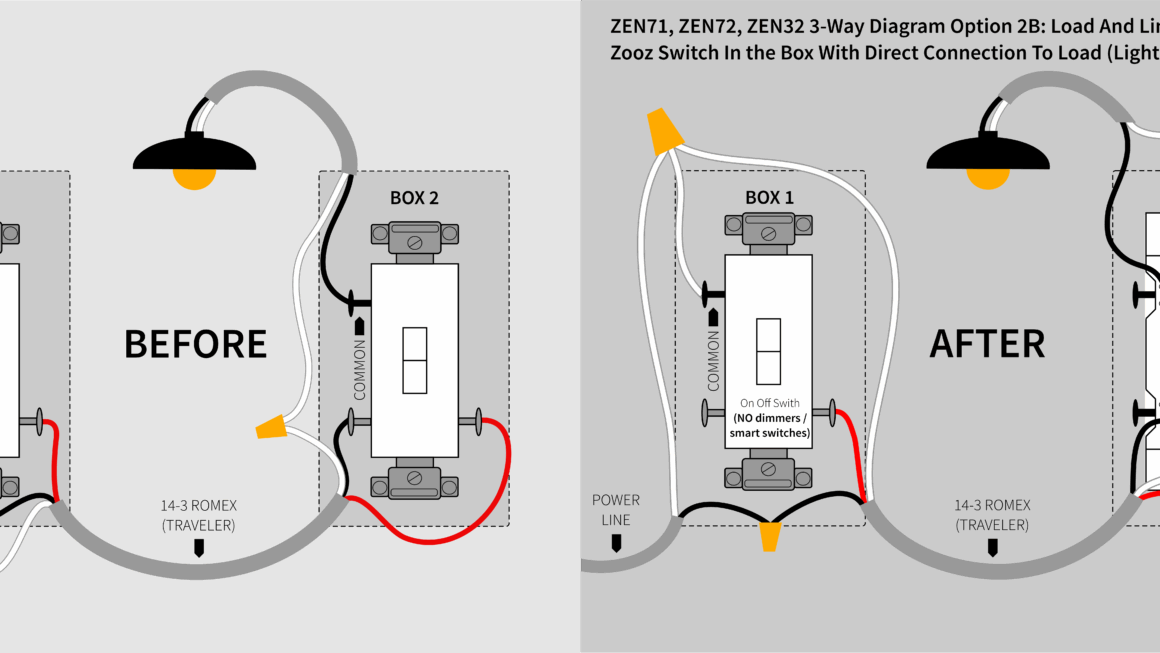
Download and Print 3-Way Switch Wiring Diagram Power At Light Listed below