If you’re looking to set up a 36V trolling motor for your boat, you’ll need to know how to properly wire it. Having the right wiring diagram is crucial to ensure everything is connected correctly and functions smoothly.
With the right information at your fingertips, you can easily navigate the wiring process and have your trolling motor up and running in no time. Understanding the 36V trolling motor wiring diagram is essential for a successful installation.

Related Post 7-Way Semi Trailer Plug Wiring Diagram With Abs
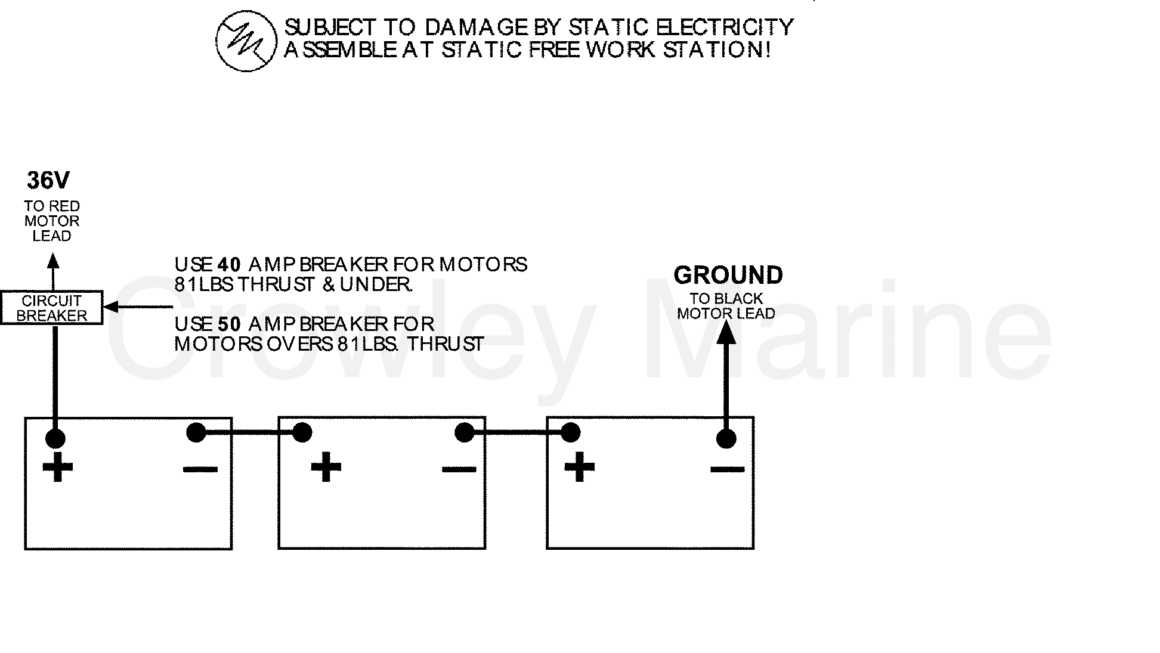
One of the most important things to consider is the voltage of the batteries you are using. With a 36V system, you’ll likely be using three 12V batteries connected in series to achieve the desired voltage.
Following the wiring diagram step by step will help you avoid any potential mistakes and ensure a smooth installation process. It’s important to double-check all connections and make sure everything is securely in place before testing the motor.
By following the 36V trolling motor wiring diagram closely, you can set up your system with confidence and avoid any unnecessary complications. With the right guidance, you’ll be cruising on the water in no time.
Now that you have a better understanding of the 36V trolling motor wiring diagram, you can tackle the installation process with ease. By following the proper steps and paying attention to detail, you’ll have your motor up and running in no time. Happy boating!
Download and Print 36V Trolling Motor Wiring Diagram Listed below