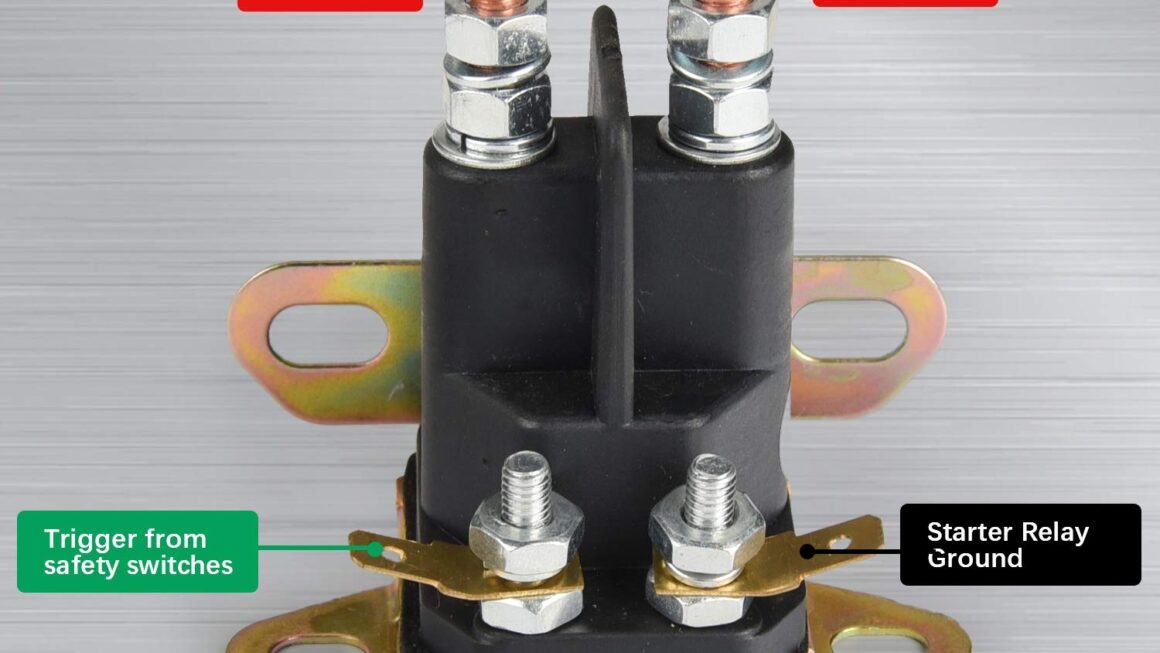
Are you looking for a simple and easy-to-understand 4 post solenoid wiring diagram? Look no further! In this article, we will walk you through the process of wiring a 4 post solenoid in a clear and concise manner.
Understanding how to wire a 4 post solenoid is essential for anyone working with electrical systems. Whether you are a DIY enthusiast or a professional mechanic, having a good grasp of this process can save you time and frustration.

Related Post Denso 4 Wire O2 Sensor Wiring Diagram
Start by identifying the positive and negative terminals on the solenoid. The positive terminal is usually marked with a plus sign, while the negative terminal is marked with a minus sign. Connect the positive terminal to the positive side of the battery using a wire, and do the same with the negative terminal.
Next, connect the other end of the positive wire to the starter motor, and the other end of the negative wire to the ground. Make sure all connections are tight and secure to prevent any issues with the electrical system. Once everything is connected, double-check your work before testing the solenoid.
Testing the solenoid is crucial to ensure that everything is working properly. Turn the ignition key to the “on” position and listen for a clicking sound coming from the solenoid. If you hear the click, it means the solenoid is functioning correctly. If not, double-check your connections and make any necessary adjustments.
In conclusion, wiring a 4 post solenoid is a straightforward process that anyone can do with the right tools and knowledge. By following the steps outlined in this article, you can successfully wire a 4 post solenoid and keep your electrical system running smoothly.
Download and Print 4 Post Solenoid Wiring Diagram Listed below