Are you looking to install a 7 pin rocker switch but not sure how to wire it up? Look no further! In this article, we will walk you through a simple 7 pin rocker switch wiring diagram that anyone can follow.
Whether you are a beginner or an experienced DIY-er, wiring a 7 pin rocker switch can seem daunting. But with the right guidance, it can be a breeze. Let’s dive into the details!

Related Post Ford Turn Signal Switch Wiring Diagram
Next, connect a wire from the power source to terminal 1 on the rocker switch. This will provide power to the switch itself. Then, connect wires from terminals 2 to 7 to the accessories you want to control, following the manufacturer’s instructions.
Once all the wires are connected, double-check your connections to ensure everything is secure. Then, test the switch to make sure it is functioning correctly. If everything works as expected, you have successfully wired up your 7 pin rocker switch!
Remember, safety is key when working with electrical components. Always turn off the power source before starting any wiring project and double-check your connections to avoid any mishaps.
In conclusion, wiring a 7 pin rocker switch doesn’t have to be complicated. With the right instructions and a bit of patience, anyone can tackle this project. So go ahead, give it a try, and enjoy the convenience of controlling multiple accessories with just a flip of a switch!
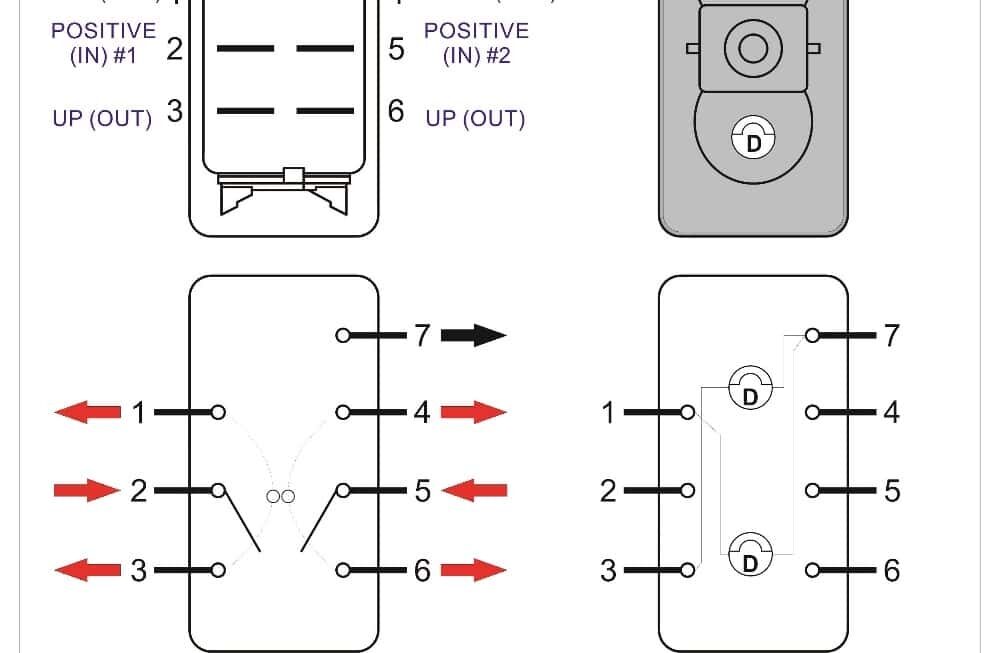
Download and Print 7 Pin Rocker Switch Wiring Diagram Listed below