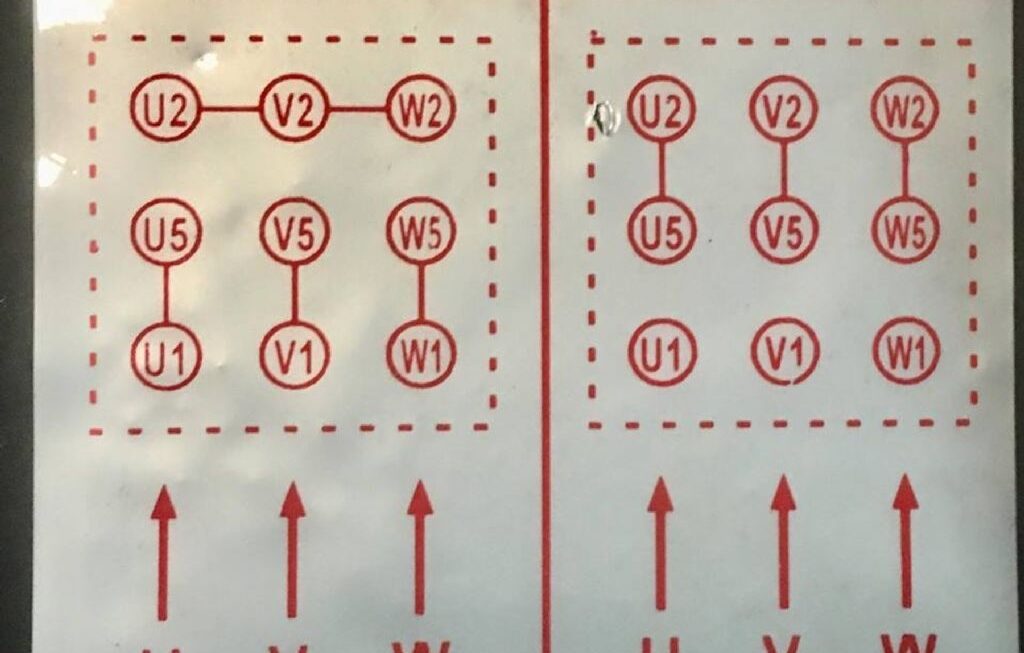
If you’re in the process of wiring a 9 lead motor, you may be feeling a bit overwhelmed. But fear not! We’re here to help guide you through the process with a handy wiring diagram.
Understanding how to wire a 9 lead motor correctly is essential to ensure it operates efficiently and safely. With the right information and a bit of patience, you’ll have your motor up and running in no time.

Related Post Color Code Gm Steering Column Wiring Diagram
Once you’ve identified the leads, you can begin the wiring process. Follow the wiring diagram carefully, making sure to connect each lead to the appropriate terminal. Double-check your connections to avoid any potential issues down the line.
Pay close attention to the voltage requirements of your motor. Incorrect wiring can result in damage to the motor or even pose a safety hazard. If you’re unsure about any aspect of the wiring process, don’t hesitate to seek advice from a professional.
After you’ve completed the wiring, it’s a good idea to test the motor to ensure everything is functioning as it should. Make any necessary adjustments and retest if needed. Once you’re satisfied with the results, you can put your motor to work with confidence.
In conclusion, wiring a 9 lead motor doesn’t have to be a daunting task. With the right information and a methodical approach, you can successfully wire your motor and enjoy reliable performance. Remember to take your time, double-check your connections, and seek help if needed. Happy wiring!
Download and Print 9 Lead Motor Wiring Diagram Listed below