If you’re looking to do some DIY electrical work in your home, understanding basic light switch wiring is essential. Whether you’re replacing an old switch or installing a new one, having a good grasp of how it works can save you time and frustration.
Learning how to wire a light switch is not as complicated as it may seem. With a few simple steps and the right tools, you can easily tackle this project on your own. In this article, we’ll walk you through the basics of light switch wiring.

Related Post Outlet And Switch Wiring Diagram
To wire a light switch, you’ll need to turn off the power at the circuit breaker, remove the old switch, and connect the wires to the new switch. Remember to follow the manufacturer’s instructions and local building codes to ensure a safe and proper installation.
When connecting the wires, make sure to match the colors – black wires to black wires, white wires to white wires, and green or bare copper wires to the ground terminal. Use wire nuts to secure the connections and wrap them with electrical tape for added safety.
Once you’ve wired the switch, carefully tuck the wires back into the electrical box, attach the switch to the box, and secure it with screws. Turn the power back on at the circuit breaker and test the switch to make sure it’s working properly. If everything looks good, you’re all set!
Remember, if you’re ever unsure about any part of the wiring process, don’t hesitate to consult a professional electrician. Your safety is always the top priority when working with electricity. With a little knowledge and caution, you can confidently tackle basic light switch wiring projects in your home.
Now that you have a better understanding of basic light switch wiring, you can confidently tackle this DIY project in your home. Remember to always prioritize safety and follow proper procedures to ensure a successful installation. Happy wiring!
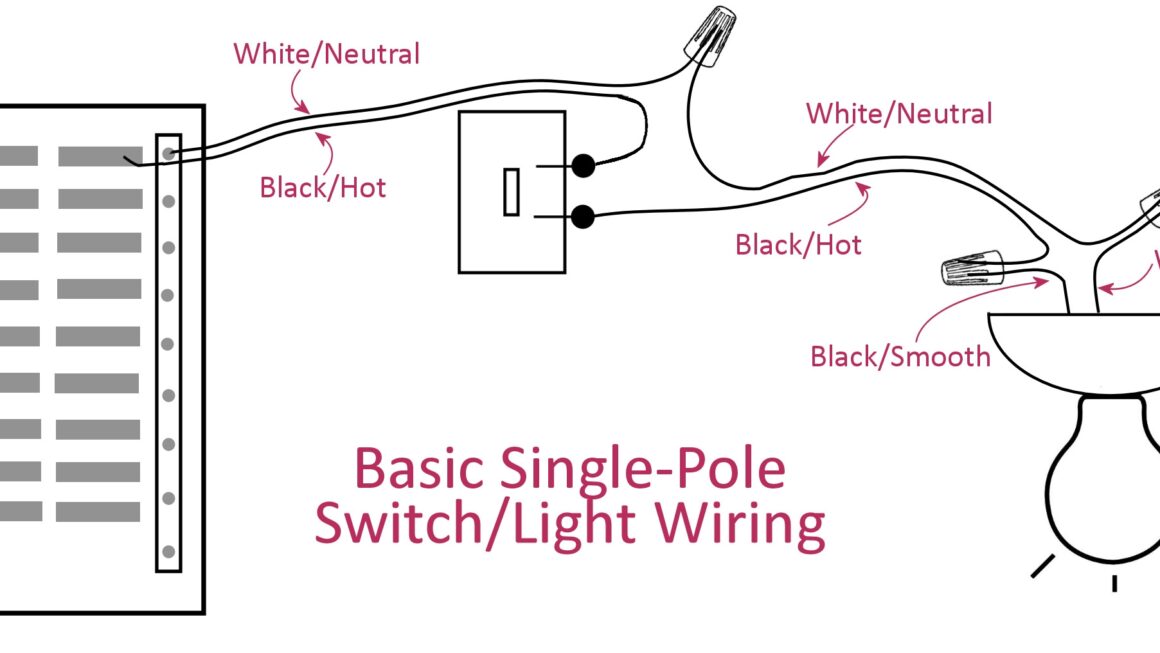
Download and Print Basic Light Switch Wiring Diagram Listed below