If you’re looking for a Bennett Trim Tab wiring diagram, you’ve come to the right place. Understanding how to wire your trim tabs correctly is crucial for ensuring they work effectively on your boat.
Trim tabs are essential for improving your boat’s performance and stability on the water. They help to adjust the angle of your boat in the water, making it easier to navigate through different conditions.

Related Post Ezgo Gas Golf Cart Wiring Diagram
Begin by disconnecting the power source to ensure safety while working on the wiring. Next, locate the control switch and follow the manufacturer’s instructions for proper installation. Make sure to use the correct gauge of wire for the installation to prevent overheating or electrical issues.
Once you have connected the control switch, you can move on to wiring the trim tab actuators. Ensure that the wires are securely connected and properly insulated to prevent any short circuits. Double-check your connections before testing the trim tabs to ensure everything is functioning correctly.
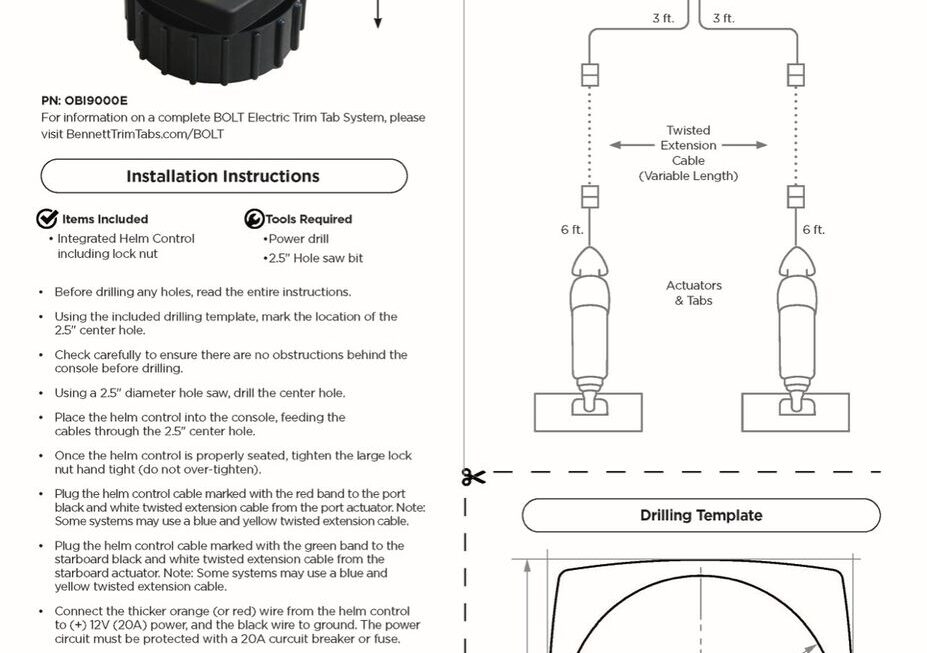
Refer to the Bennett Trim Tab wiring diagram provided by the manufacturer for specific instructions on how to wire your trim tabs. Following the diagram accurately will help you avoid any potential errors and ensure your trim tabs operate smoothly.
In conclusion, understanding how to wire your Bennett Trim Tabs is essential for maximizing their performance on your boat. By following the manufacturer’s guidelines and using the correct wiring diagram, you can ensure that your trim tabs work effectively and enhance your boating experience.
Download and Print Bennett Trim Tab Wiring Diagram Listed below