Looking to understand how to wire your Carrier air handler? You’ve come to the right place! In this article, we’ll break down the process of wiring your Carrier air handler step by step.
Whether you’re a seasoned DIY enthusiast or a newbie looking to tackle a new project, learning how to wire your Carrier air handler can seem daunting at first. But with the right guidance and a bit of patience, you’ll have your system up and running in no time!

Related Post Wiring Diagram For Rv Thermostat
Next, carefully follow the instructions outlined in the wiring diagram. Take your time to understand each step and double-check your work as you go along. It’s crucial to ensure that each wire is connected correctly to avoid any potential issues down the line.
If you encounter any difficulties or are unsure about a particular step, don’t hesitate to reach out to a professional for assistance. It’s better to seek help and get it right the first time than to risk damaging your Carrier air handler due to incorrect wiring.
Once you’ve completed the wiring process, carefully test your system to ensure everything is working correctly. Turn on your Carrier air handler and check for any unusual noises or malfunctions. If everything looks good, congratulations! You’ve successfully wired your Carrier air handler.
In conclusion, wiring your Carrier air handler may seem intimidating at first, but with the right tools, guidance, and a bit of patience, you can tackle this project with confidence. Remember to refer to your wiring diagram, take your time, and seek help if needed. Happy wiring!
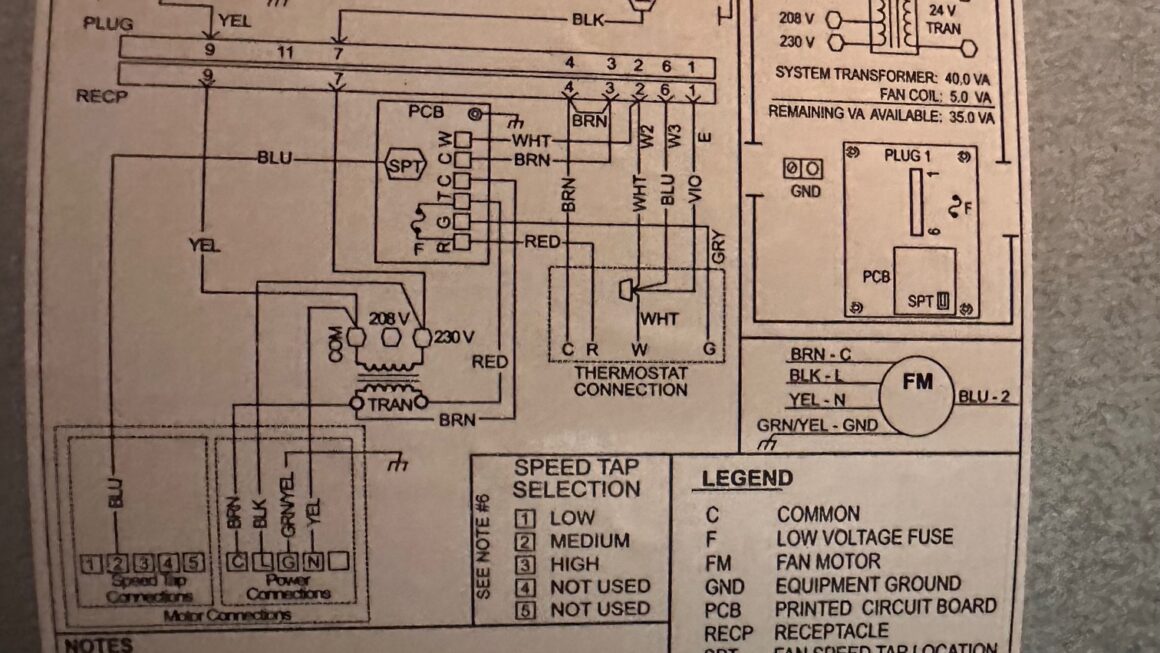
Download and Print Carrier Air Handler Wiring Diagram Listed below