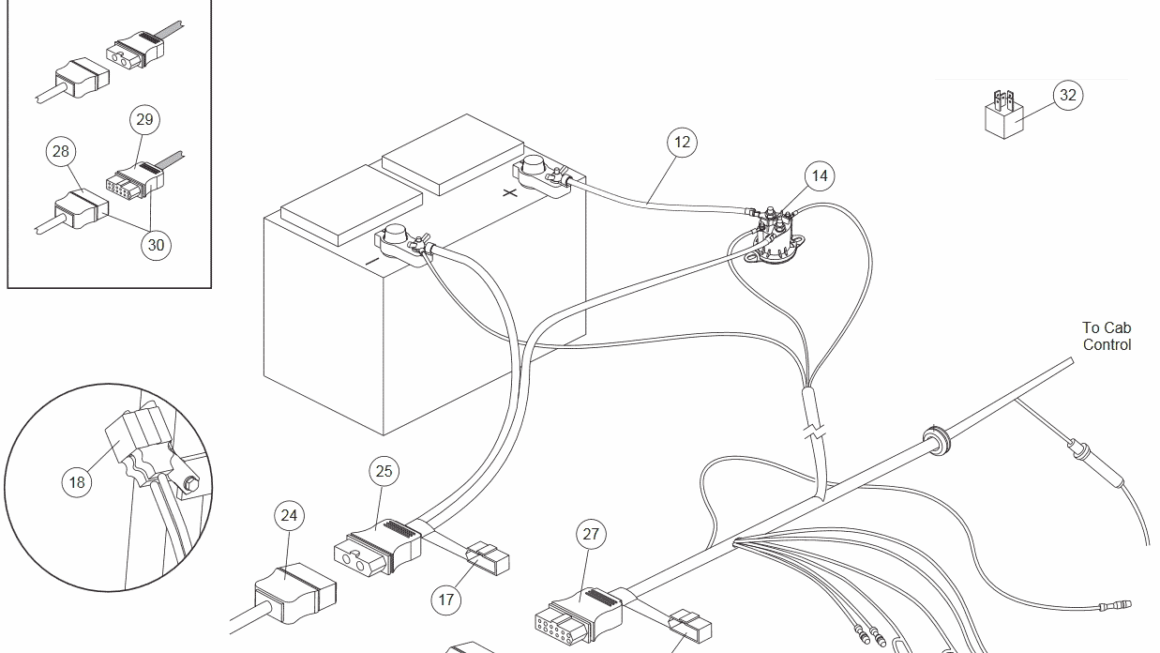
If you’re looking to install a Fisher Minute Mount 2 plow on your vehicle, you’ll need to have a good understanding of the wiring diagram. This is crucial for ensuring that everything is connected properly and functions correctly.
Understanding the Fisher Minute Mount 2 wiring diagram is not as complicated as it may seem. With a little bit of guidance and patience, you’ll be able to successfully wire up your plow in no time.

Related Post Mercury Outboard Wiring Harness Diagram
It’s important to carefully study the wiring diagram before beginning the installation process. Make sure you have a clear understanding of which wires need to be connected to each component and where they need to be routed.
One common mistake that people make when installing a Fisher Minute Mount 2 plow is not properly grounding the system. Make sure that all components are properly grounded to ensure that the system functions correctly and to prevent any electrical issues.
Once you have successfully wired up your Fisher Minute Mount 2 plow system, it’s important to test it to ensure that everything is working as it should. Take your time to carefully check all connections and make any necessary adjustments before using the plow.
In conclusion, understanding the Fisher Minute Mount 2 wiring diagram is essential for a successful installation. By following the diagram carefully and taking your time to make sure everything is connected properly, you’ll be able to enjoy the convenience of a fully functioning plow system on your vehicle.
Download and Print Fisher Minute Mount 2 Wiring Diagram Listed below