If you’re looking to install a Genie garage door opener and need to figure out the wiring, you’ve come to the right place. Understanding the wiring diagram is essential to ensure proper installation and functionality.
Genie garage door openers are known for their reliability and ease of use. With the right wiring diagram, you can easily set up your opener and enjoy the convenience of automated garage door operation.

Related Post 50 Amp Camper Wiring Diagram
Genie Garage Door Opener Wiring Diagram
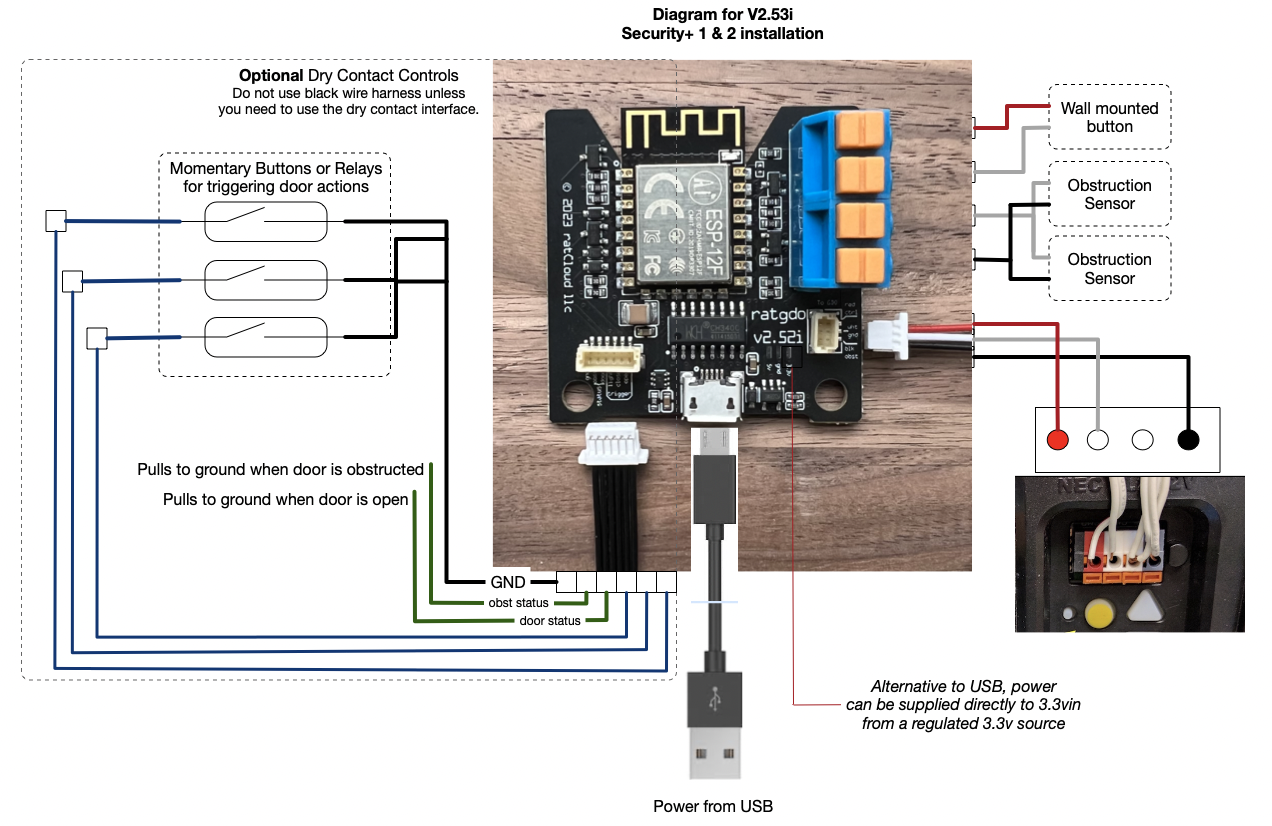
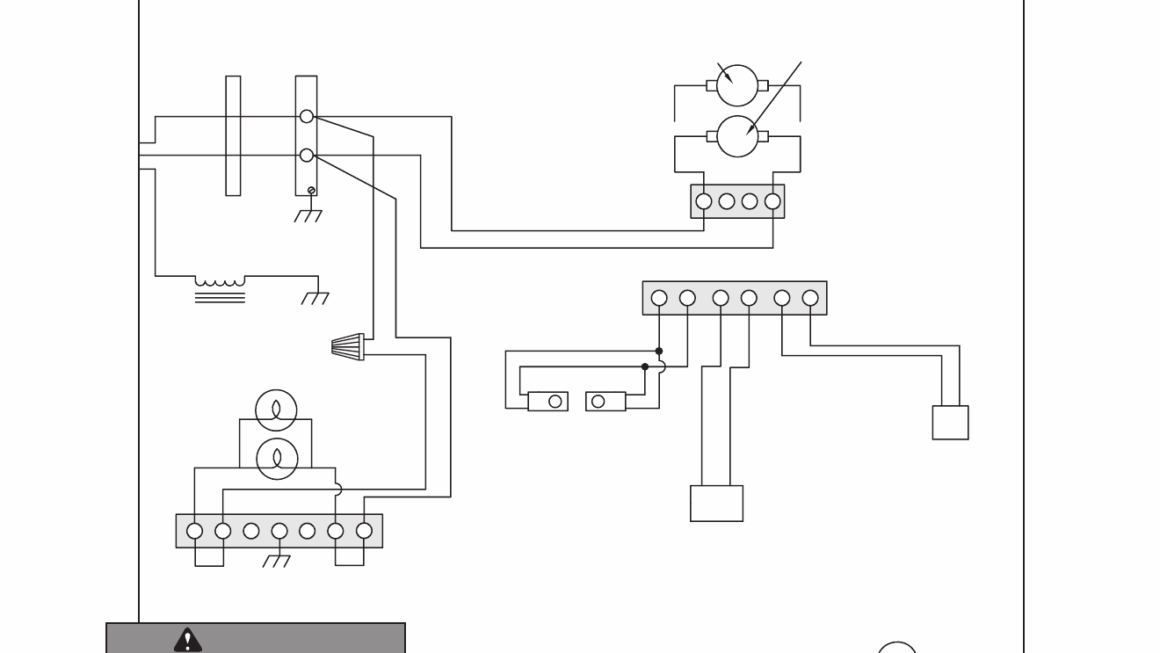
Before you start the installation process, it’s crucial to have a clear understanding of the wiring diagram. The diagram typically includes information on how to connect the opener to power sources, sensors, and other components.
Most Genie garage door openers come with detailed instructions and diagrams to help you through the installation process. Make sure to follow these instructions carefully to avoid any issues and ensure the proper functioning of your opener.
If you’re unsure about any part of the wiring diagram or installation process, don’t hesitate to seek help from a professional. It’s better to be safe than sorry when it comes to electrical work.
Once you have successfully installed your Genie garage door opener following the wiring diagram, you can enjoy the convenience and security it provides. Say goodbye to manual opening and closing of your garage door!
In conclusion, understanding the Genie garage door opener wiring diagram is crucial for a successful installation. By following the instructions carefully and seeking help if needed, you can enjoy the benefits of automated garage door operation in no time.
Download and Print Genie Garage Door Opener Wiring Diagram Listed below