If you’re looking to install a Hopkins 7 pin trailer wiring diagram, you’ve come to the right place. This handy guide will walk you through the process step by step, making it easy for even beginners to tackle.
Having a proper wiring diagram is essential for ensuring that your trailer’s lights and brakes function correctly. With the Hopkins 7 pin diagram, you can rest assured that everything is connected properly and safely.

Related Post 1987 Jeep Entire Under Hood Wiring Diagram
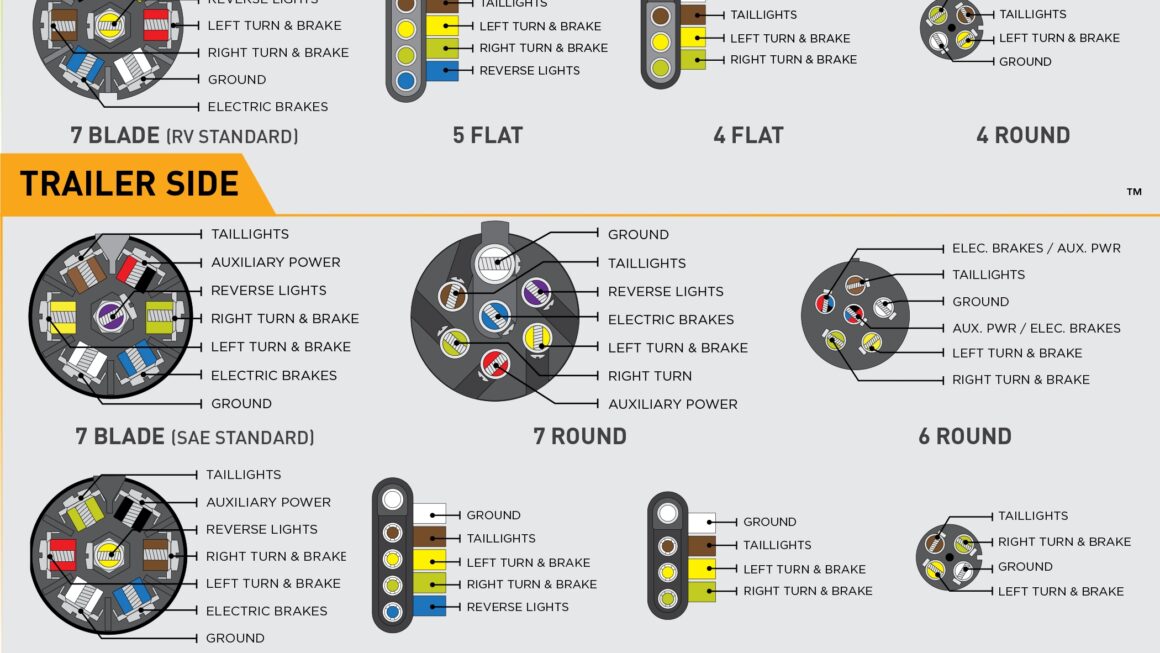
Next, locate the trailer’s existing wiring harness and identify the wires for each function (brakes, turn signals, running lights, etc.). Use the diagram as a guide to connect each wire from the trailer to the corresponding pin on the Hopkins 7 pin connector.
Once all the connections are made, use electrical tape to secure the wires and prevent any accidental shorts. Test each function (brakes, turn signals, etc.) to ensure they are working correctly. Make any necessary adjustments before securing the wiring in place.
Finally, double-check all connections and secure the wiring harness in place using zip ties or clips. Ensure that all wires are properly insulated to prevent any potential issues while on the road. With the Hopkins 7 pin trailer wiring diagram, you can hit the road with confidence knowing your trailer is properly connected.
Now that you’ve successfully installed the Hopkins 7 pin trailer wiring diagram, you can enjoy worry-free towing knowing that your trailer’s lights and brakes are functioning correctly. With proper maintenance and regular checks, your trailer will be ready for any adventure that comes your way.
Download and Print Hopkins 7 Pin Trailer Wiring Diagram Listed below