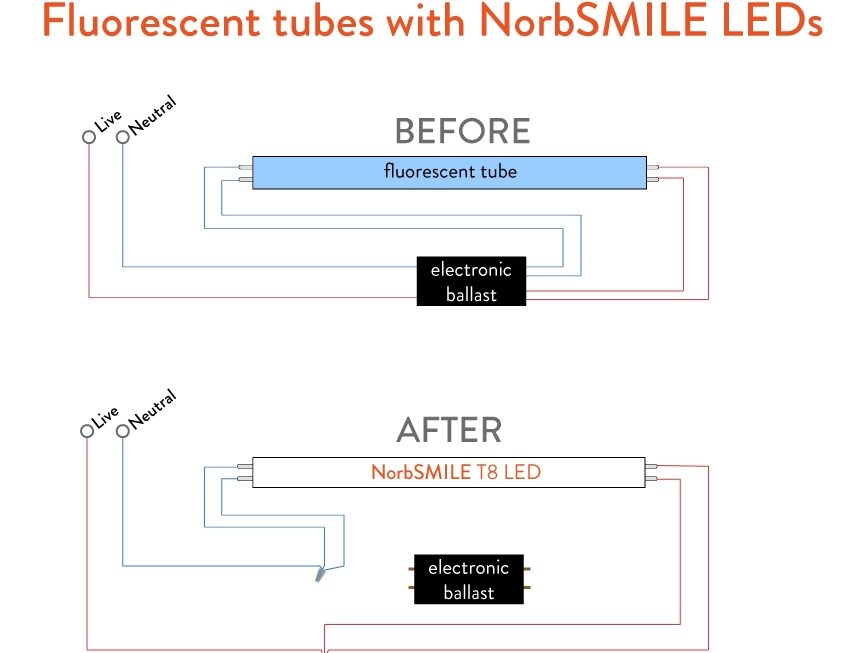
Looking to install LED lights in your home or office? You’ll need to understand how to wire the ballast bypass correctly to ensure your lights work efficiently and safely. In this article, we’ll walk you through the process step by step.
LED ballast bypass wiring diagram is essential for anyone looking to upgrade their lighting system. By bypassing the ballast, you can ensure that your LED lights function optimally and last longer. Let’s dive into the details of how to wire your LED lights without a ballast.

Related Post 3 Wire Gm Alternator Wiring Diagram
Once the ballast is removed, you can start wiring your LED lights. Connect the live wire from the power source to the live wire on the LED light fixture. Then, connect the neutral wire from the power source to the neutral wire on the LED fixture.
After connecting the wires, secure them with wire nuts and electrical tape to ensure a safe and secure connection. Finally, turn on the power at the circuit breaker and test your LED lights to make sure they are working properly. Congratulations, you have successfully wired your LED lights without a ballast!
By following the LED ballast bypass wiring diagram, you can upgrade your lighting system efficiently and cost-effectively. Say goodbye to flickering lights and high energy bills – with LED lights and the right wiring, you can enjoy bright and energy-efficient lighting for years to come.
Now that you know how to wire your LED lights without a ballast, you can confidently tackle your lighting upgrade project. Enjoy the benefits of LED lighting and the savings on your energy bills. Happy wiring!
Download and Print Led Ballast Bypass Wiring Diagram Listed below