If you’re looking to install a Leviton single pole switch, you’ve come to the right place! In this article, we’ll walk you through the wiring diagram and steps to get your switch up and running in no time.
Leviton single pole switches are a popular choice for homeowners due to their reliability and ease of installation. Whether you’re replacing an old switch or installing a new one, understanding the wiring diagram is crucial to ensure everything works properly.

Related Post Signal Stat 900 Wiring Diagram
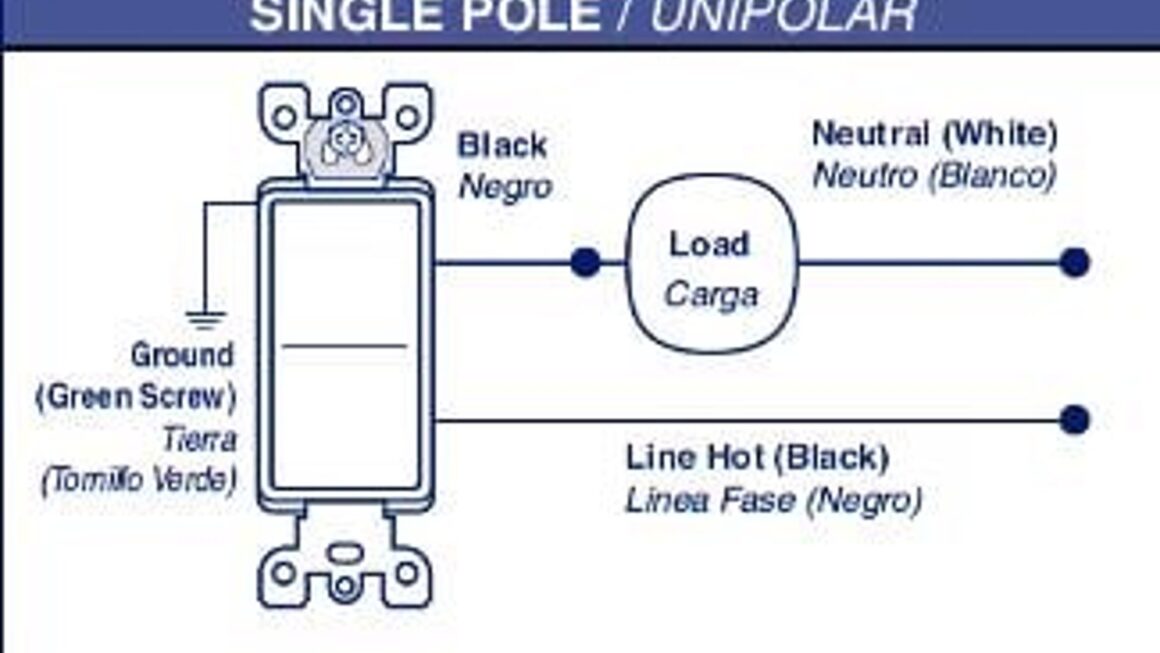
Start by connecting the black hot wire to one of the brass screws on the switch. Then, connect the white neutral wire to the silver screw on the switch. Finally, connect the bare copper ground wire to the green screw on the switch.
Once you’ve made all the connections, carefully tuck the wires back into the electrical box and secure the switch in place. Turn the power back on and test the switch to ensure it’s working correctly. If everything looks good, you’re all set!
Remember, if you ever feel unsure about working with electrical wiring, it’s always best to consult a professional electrician. Your safety is the top priority, so don’t hesitate to ask for help if you need it.
With this simple guide, you’ll be able to confidently install a Leviton single pole switch in your home. Enjoy the convenience and control that a new switch can bring to your space!
Download and Print Leviton Single Pole Switch Wiring Diagram Listed below