So you’ve decided to upgrade your car audio system and you need to install a line output converter. Understanding how to properly wire it is crucial to ensure you get the best sound quality possible.
Whether you’re a car audio enthusiast or a beginner looking to improve your sound system, knowing the correct wiring diagram for a line output converter is essential. Let’s dive into the details!

Related Post 36V Trolling Motor Wiring Diagram
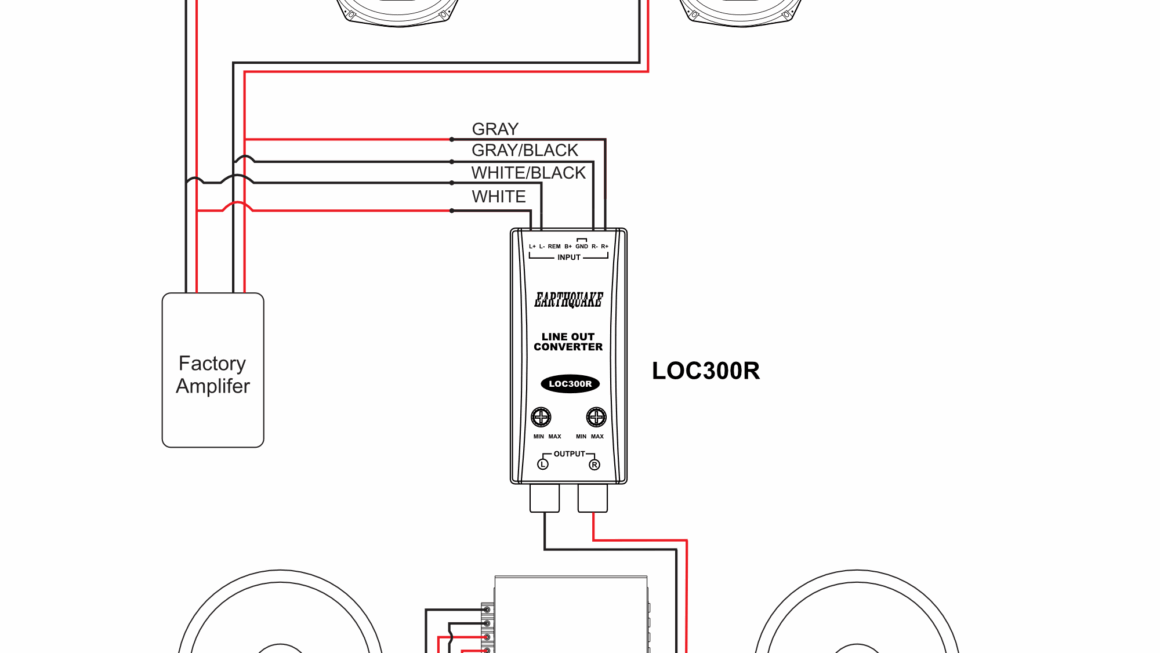
Next, you’ll need to identify the speaker wires that carry the audio signal. Typically, these are color-coded to help you distinguish between positive and negative connections. Use a wiring diagram specific to your vehicle make and model to ensure accuracy.
Once you’ve identified the speaker wires, connect them to the input side of the line output converter. The converter will then process the audio signal and provide RCA outputs that can be connected to your aftermarket amplifier or subwoofer.
After connecting the output side of the line output converter to your amplifier or subwoofer, double-check all connections to ensure they are secure. Once everything is properly connected, you can reattach the car battery and test your new audio setup.
Remember, proper wiring is crucial to avoid any potential damage to your audio equipment. If you’re unsure about any step of the wiring process, it’s always a good idea to consult a professional or refer to the manufacturer’s instructions.
With the right wiring diagram and a bit of patience, you’ll be able to enjoy a high-quality audio experience in your car. So go ahead, get your hands dirty, and take your car audio system to the next level!
Download and Print Line Output Converter Wiring Diagram Listed below