Looking to install a Lutron 3 way switch in your home but not sure how to wire it up? You’ve come to the right place! In this article, we’ll walk you through the process step by step, so you can get your new switch up and running in no time.
Before we dive into the wiring diagram, let’s take a quick look at what a Lutron 3 way switch actually is. Essentially, it’s a type of switch that allows you to control a single light fixture from two different locations. This is perfect for rooms with multiple entry points or staircases.

Related Post 2008 Bmw 328Xi Radio Harness Wiring Diagram
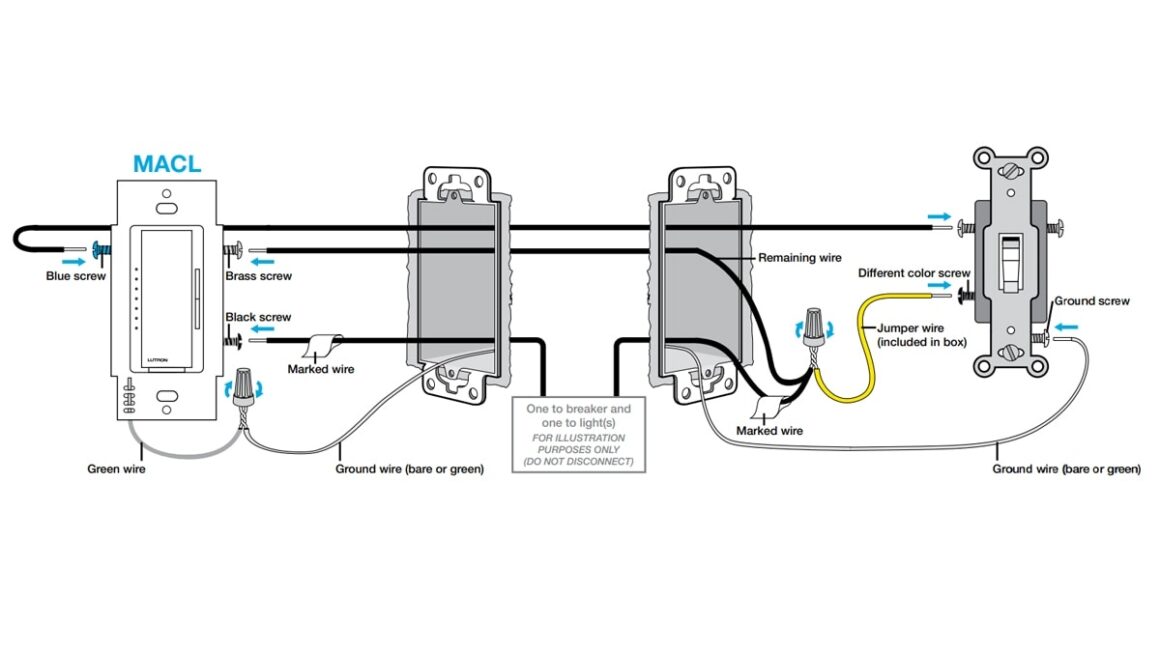
Lutron 3 Way Switch Wiring Diagram
Now, let’s get into the nitty-gritty of how to wire up your Lutron 3 way switch. First, you’ll need to identify the common wire in your existing switch setup. This wire is typically black or red and is connected to the dark-colored screw on the switch.
Next, you’ll need to connect the common wire to the common terminal on your new Lutron switch. This terminal is usually labeled as “COM” or “C” and is typically a different color than the other terminals on the switch.
After connecting the common wire, you’ll then need to identify the two traveler wires in your existing setup. These wires are typically white or yellow and are connected to the light-colored screws on the switch. It doesn’t matter which traveler wire goes to which terminal on the Lutron switch.
Finally, once you’ve connected the traveler wires, you’ll need to connect the ground wire to the ground terminal on the Lutron switch. This terminal is usually green and is there to ensure the safety of the switch and prevent electrical shocks.
And there you have it! Your Lutron 3 way switch should now be wired up and ready to use. If you have any questions or run into any issues during the installation process, don’t hesitate to reach out to a professional electrician for help.
Download and Print Lutron 3 Way Switch Wiring Diagram Listed below