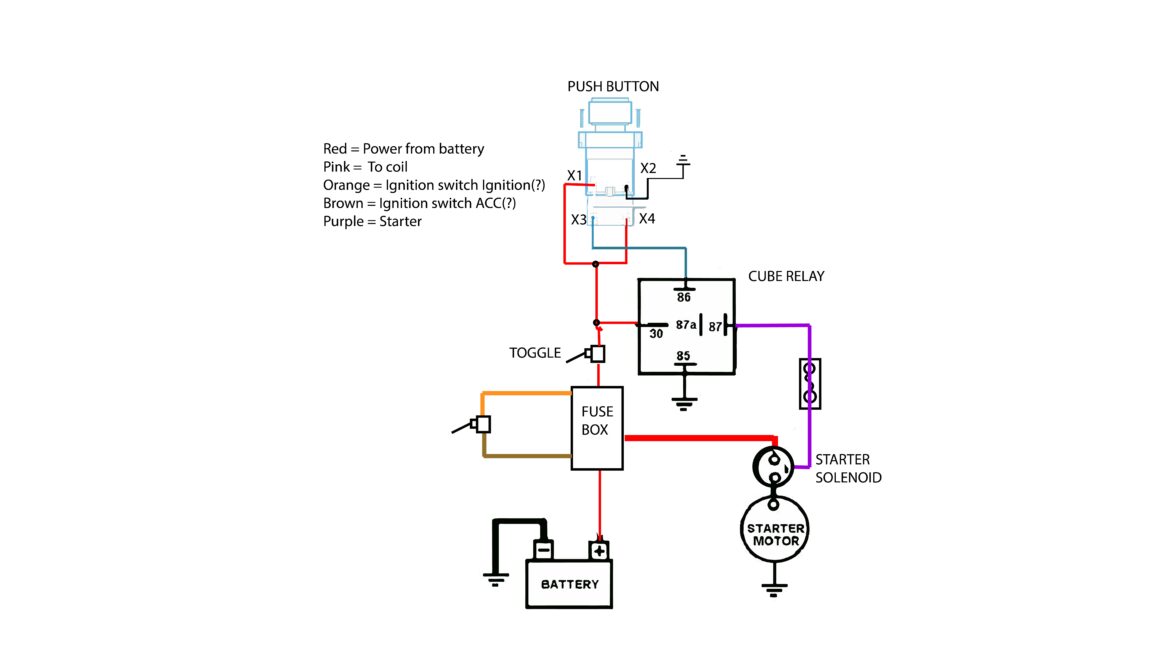
If you’re looking to install a push button starter switch in your vehicle, you’ve come to the right place! In this article, we’ll provide you with a wiring diagram to help you get the job done smoothly and efficiently.
Whether you’re a car enthusiast or just looking to add some convenience to your daily drive, a push button starter switch can be a great addition to your vehicle. With the right tools and a little know-how, you can easily install one yourself.

Related Post Chinese Scooter Ignition Switch Wiring Diagram
Start by locating the ignition wire in your vehicle’s wiring harness. This wire is typically connected to the ignition switch and carries the necessary voltage to start the engine. You’ll need to disconnect this wire and connect it to the push button starter switch instead.
Next, identify the starter wire in the wiring harness. This wire is responsible for sending a signal to the starter motor, engaging the engine when you turn the key in the ignition. You’ll need to connect this wire to the appropriate terminal on the push button starter switch.
Once you’ve made these connections, test the push button starter switch to ensure that it’s functioning correctly. If everything is connected properly, you should be able to start your vehicle with the push of a button. Congratulations, you’ve successfully installed a push button starter switch!
In conclusion, installing a push button starter switch can be a fun and rewarding project for any car enthusiast. With the help of a wiring diagram and a little patience, you can easily add this convenient feature to your vehicle. So why wait? Get started on your installation today and enjoy the benefits of a push button starter switch!
Download and Print Push Button Starter Switch Wiring Diagram Listed below